Friday, 24 February 2017

How to make Pokemon trainer leggings. Pokemon Go cosplay.

So  Pokemon Go.  You can go with just solid black leggings, or you can do the ones with the purple stripe down the side, which ever you prefer.

I prefer the ones with the purple stripe down the side. Mostly cause my romper has a random purple design on the chest that would kinda be weird to be the only place with purple, and because purple is awesome.

It's pretty easy to add to an existing pattern, but just in case here is how you draft the pattern. I used McCalls 7026, because I can't find the tights pattern I drafted right now.   At least I used this for a store display when I still worked in a fabric store, so I know they fit.


So cut out the tights pattern to whatever size you are and the  trace that sucker out (if you are going to reuse the pattern later, if you are never going to reuse it, you can probably just cut up the original).


Find the center of the side of your legging.  Legging/tights patterns come with the front and back as one piece. I just held it up to myself and marked it in the center to do it.  You can also just eyeball it on the flat pattern.


Once  you have found the center, draw a line from the waist to the cuff as a guideline.


Decide how big you want your stripe to be, divide that by 2 and add that on to each side of that center line. I chose to make it easy on myself and just did 2 inches.


Do that all the way down.


Then label your pattern pieces, cut apart.
 IMPORTANT: once you have done this, remember that the seams where you attach the stripe to the rest of the leggings DOES NOT have seam allowances!!  So do not forget to either add that to your pattern, or make sure when you cut it out you add them back in, or they will be too tight. I left 1/4 inch seam allowances on all 3 pieces when I cut them out.
Once you have it all cut out and your seam allowances are added in, pin the stripe back into the front and back pieces and sew them together.  And then finish making them either by following the instructions if you need to or not.

Friday, 3 February 2017

To catch them is my real quest~

To train them is my cause~


I have my romper almost done!  I just need to bind the armholes and neck, put the purple detail on the chest and add a hook an eye.

I have a long torso, a bone of  contention for one-peice things ever since I hit puberty.  One pieces almost never fit. One peices either give me a back wedgie or the far worse fontral wedgie. So seeing as this is a commercial pattern and not one I drafted for myself, I knew that length would be an issue. The world is designed for a standard sized person and the world is dumb for that. People have shapes.

Thankfully, I discovered Jalie patterns, a Canadian company that does dance wear. I used one of their patterns for the base of my Sailor Venus costume. What has that got to do with this McCalls pattern? Well, Jalie has a part of their webiste for fit issues which includes how to get the exact amounts to add so it will fit right for you, and it can be used with any pattern. THIS IS SO HELPFUL.

I ended up having to add 5cm all the way around to get this to not give wedgies, and I can say, having tried it, it is a super comfortable romper.

The rest will be made later. Since I an now self-employed and have lost my sweet, sweet staff discount (how I miss them)  I'm waiting for a 50% off sale on the 13th to buy everything else.


Tuesday, 31 January 2017

I wanna be the very best~

Like no one ever was~

I'm starting work on one of my cosplay costumes for this summer, can you guess what it is?


Yup!  It's a Team Instinct Pokemon Go trainer.  This is a quick costume, I'll be using the McCalls 7556 pattern as a base, ignoring most of what they want me to do, cause it is not accurate.


 I am also planning on making a "juvenile" Weepinbell for my Pokemon. I'm calling it a Juvenile because these suckers are apparently 1m tall according to the pokedex and I am not carrying around a 1m tall plush in New Brunswick summer humidity. I will however carry around one that is like a foot or foot and a half big.  That is manageable.

I'm planning to put a voice box in it so it will randomly scream at people.

Sunday, 2 October 2016

That is as far as I shall go today.


Everything is attached!  Huzzah!  My back is killing me though.  At least it looks like a coat now.


All that is left is a bunch of small finicky jobs like: putting in the shoulder pads, attaching the lining/sleeve linings, hemming it and buttons and buttonholes.  None of which are huge jobs, just time consuming ones.


I think if I work at it, most of it will be done by the end of the week.  Then I can start on the belt, crown and daggers.

Thursday, 29 September 2016

Well.. that went faster then I thought.

I was worried i wouldn't be able to bead, embroider and finish my coat as well as make the leaf crown, belt and daggers in time for halcon in November.  Well, it took less time then I thought to finish the pocket flaps, add the lace details around the back and shoulders and bead it then I thought.

Also less beads. I bought WAY to many beads.


I had hoped to be further along, but along came a 24 hour flu and I slept for a day and a half. Still even with that, I managed to accomplish quite a bit!

I finished the pocket flaps while re-watching all of Voltron: Legendary Defender and then some of first season Young Justice. Which if you haven't watched, go watch both of them. They are awesome.
 I'll add the interfacing to the back of them and the lace covered lining for the underside this weekend and then they will be ready for attaching when the time comes.


Here is a close up with less washout due to flash.  The fabric is actually closer to the green pictured above. Fun fact: You do not have to be 100% healthy to embroider. It is mindless enough or something I guess, that I finished the last bit of it last night when I was sick.

This is the back lace detail. It doesn't look like much here, since this was taken while it was laying flat on my couch. This view would be from the neckline up to the waist. It took me 3 tries to fussy cut out the lace into a look I liked.  Good thing the lace was on sale, I bought what was left and I had a ton left over. I'm not usually that wasteful.

Again, a fabulous shot of my jacket on my couch, cat hair and all I think.  The lace works its way up from a point about 4cm above my actual waistline, broadens out over the back and shoulders, then wraps around to the center front.
I probably could have done more with the beads, but I didn't want to over do it. I actually keep worrying that I may already be over doing it, but then I look at the pictures in my copy of Historical Fashion in Detail: the 17th and 18th centuries, and it looks downright subdued.
(Also holy crow, that is not what I paid for this book O_O)

Anyway, with the stuff that I thought would take 100% more time done, I may have this coat mostly completed and ready to go by the end of the weekend.  Which gives me a month to make the crown, belt and daggers.


By Jove, I think I may just be able to do it!


Friday, 23 September 2016

Second day of Autumn !


This being the second day of autumn, it seems prudent to post an update on my fall themed Elf!  I've been busy all week working on it in some form or another. I started with then embroidery on the pocket flaps, something I am going back to after this update, and finished (for now) with the lining and sleeves.


Wednesday night I cut out the lace overlays for the pockets, lower lining and under sleeves and 3 hours later I had everything basted together and pinned as well.

Here is the underside of the pocket flaps and my under sleeve.


And here is the pile of lining before I pinned it all.

Today was spent sewing my lining together, sewing the sleeves and adding the cuffs.  Aside from some quick basting of the lining to keep it from shifting when I attach it to the coat, the sleeves are done.

And here is the lining all together!  I left the top plain, as my body will mostly block that, so there was no real point. I'm loving how it looks.

I think it is all gonna look pretty spiffy when it is all done.  Now I just need to finish my pocket flaps and cut out the lace overlay for the center back and shoulders of the coat. Then its some beading and putting it all together.

Did I mention I also need (well want, therefore need) to make a belt with dagger holders for my legs, carve the daggers AND make a fall leaf crown as well?  I can get all that done by November, right?


Wednesday, 21 September 2016

Cough cough hack PUH!

These are the noises one makes when working with faux fur.

Seriously, it looked like a Raccoon exploded in my sewing room for a while there.  I had to keep the vacuum within arms reach.

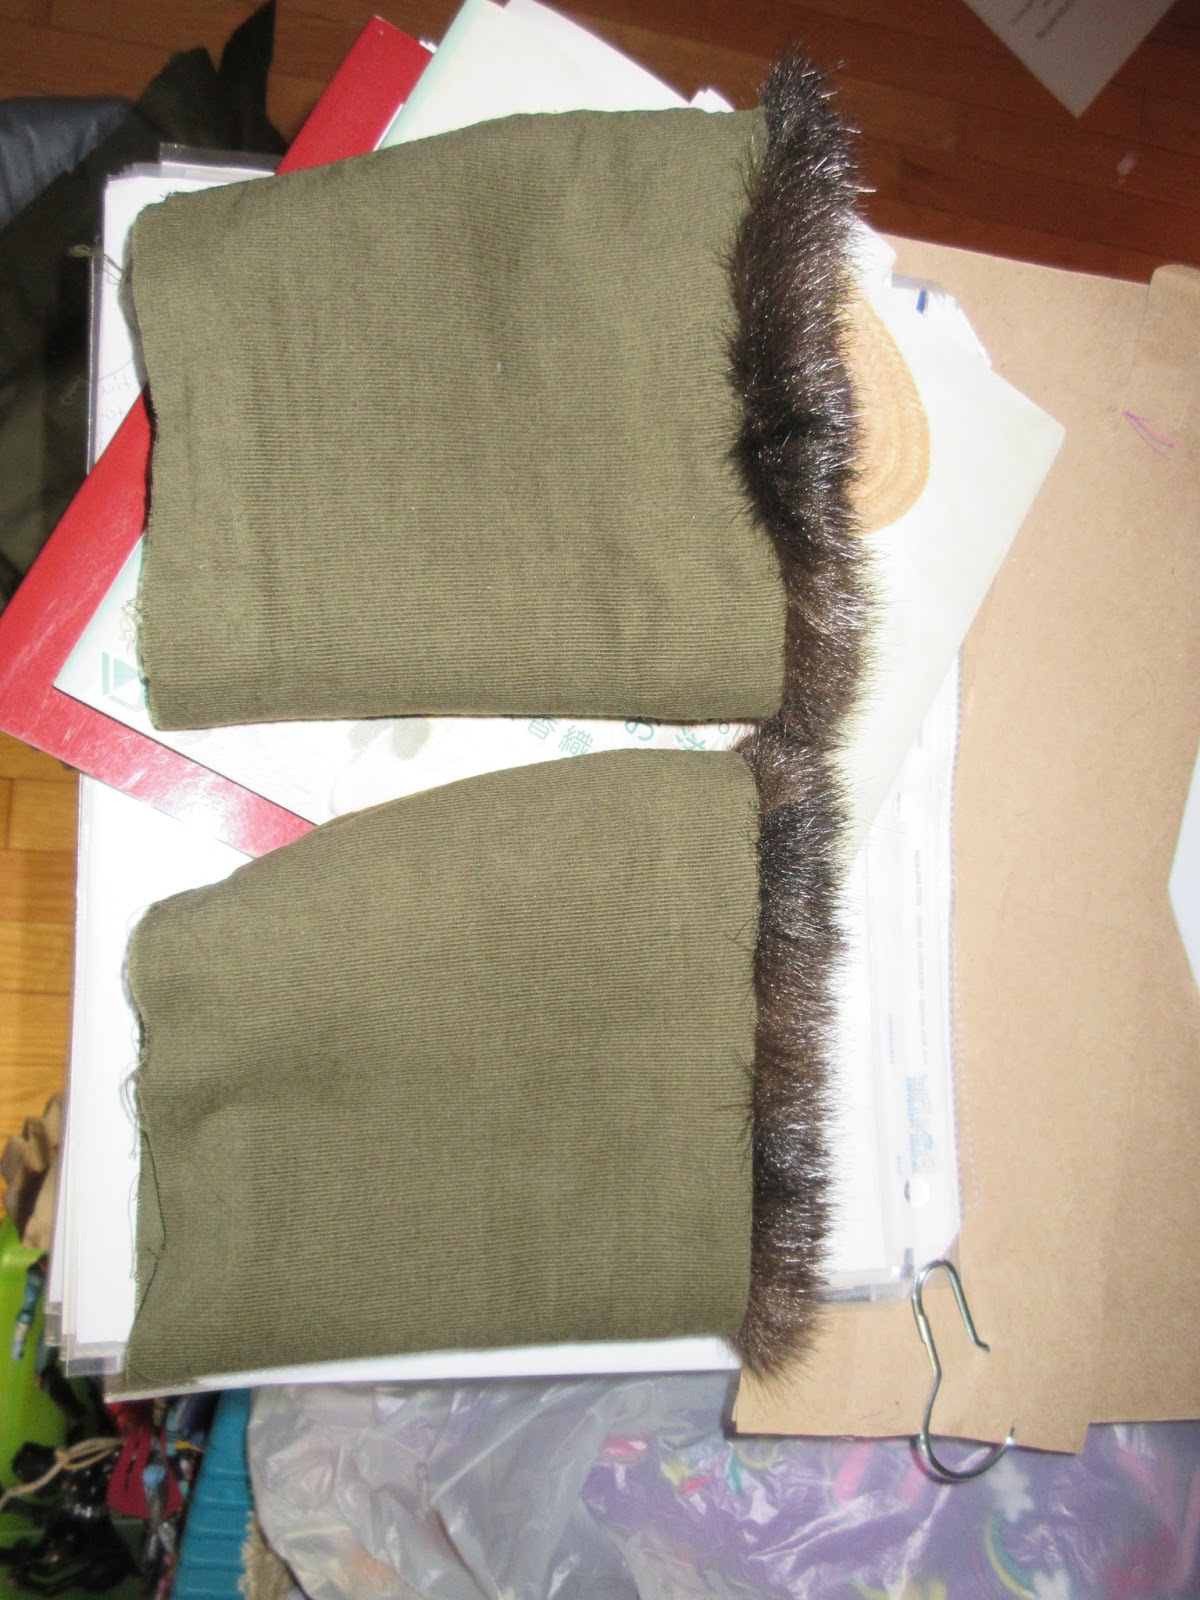
In the end though I think the hood and cuffs turned out well.

 The hood is over-sized and lined in fur (outer shell is a very fine wale Corduroy).


And the cuffs are also lined in fur. I'll be able (in theory) to wear them down over my hands where they will look like this, or flipped up to show off the fur.

The outer coat is all sewn too.  My lining is in a pile on the floor, and now that I have time to spare thanks to a very selfless and brave Squirrel that sacrificed itself to knock out the power at the fabric store I work in (may it RIP) I can cut out the lace details.

I've decided to do the leaf embroidery on the pocket flaps of the coat as well.  I started one while re-watching Voltron (the new one) and it is mostly done already.


ALSO~

I was at Capercon this weekend and got some pictures of both Dipper and Star Butterfly, so stay tuned for those.


Monday, 25 July 2016

Autumn Ranger.

11 movies (mostly horror and a few early Dreamworks animated) a full season of Young Justice and 15 minutes during a lunch break and the vest embroidery is done!


Now to finish the pants and shirt.

Sunday, 17 July 2016

Original design: Autumn Ranger


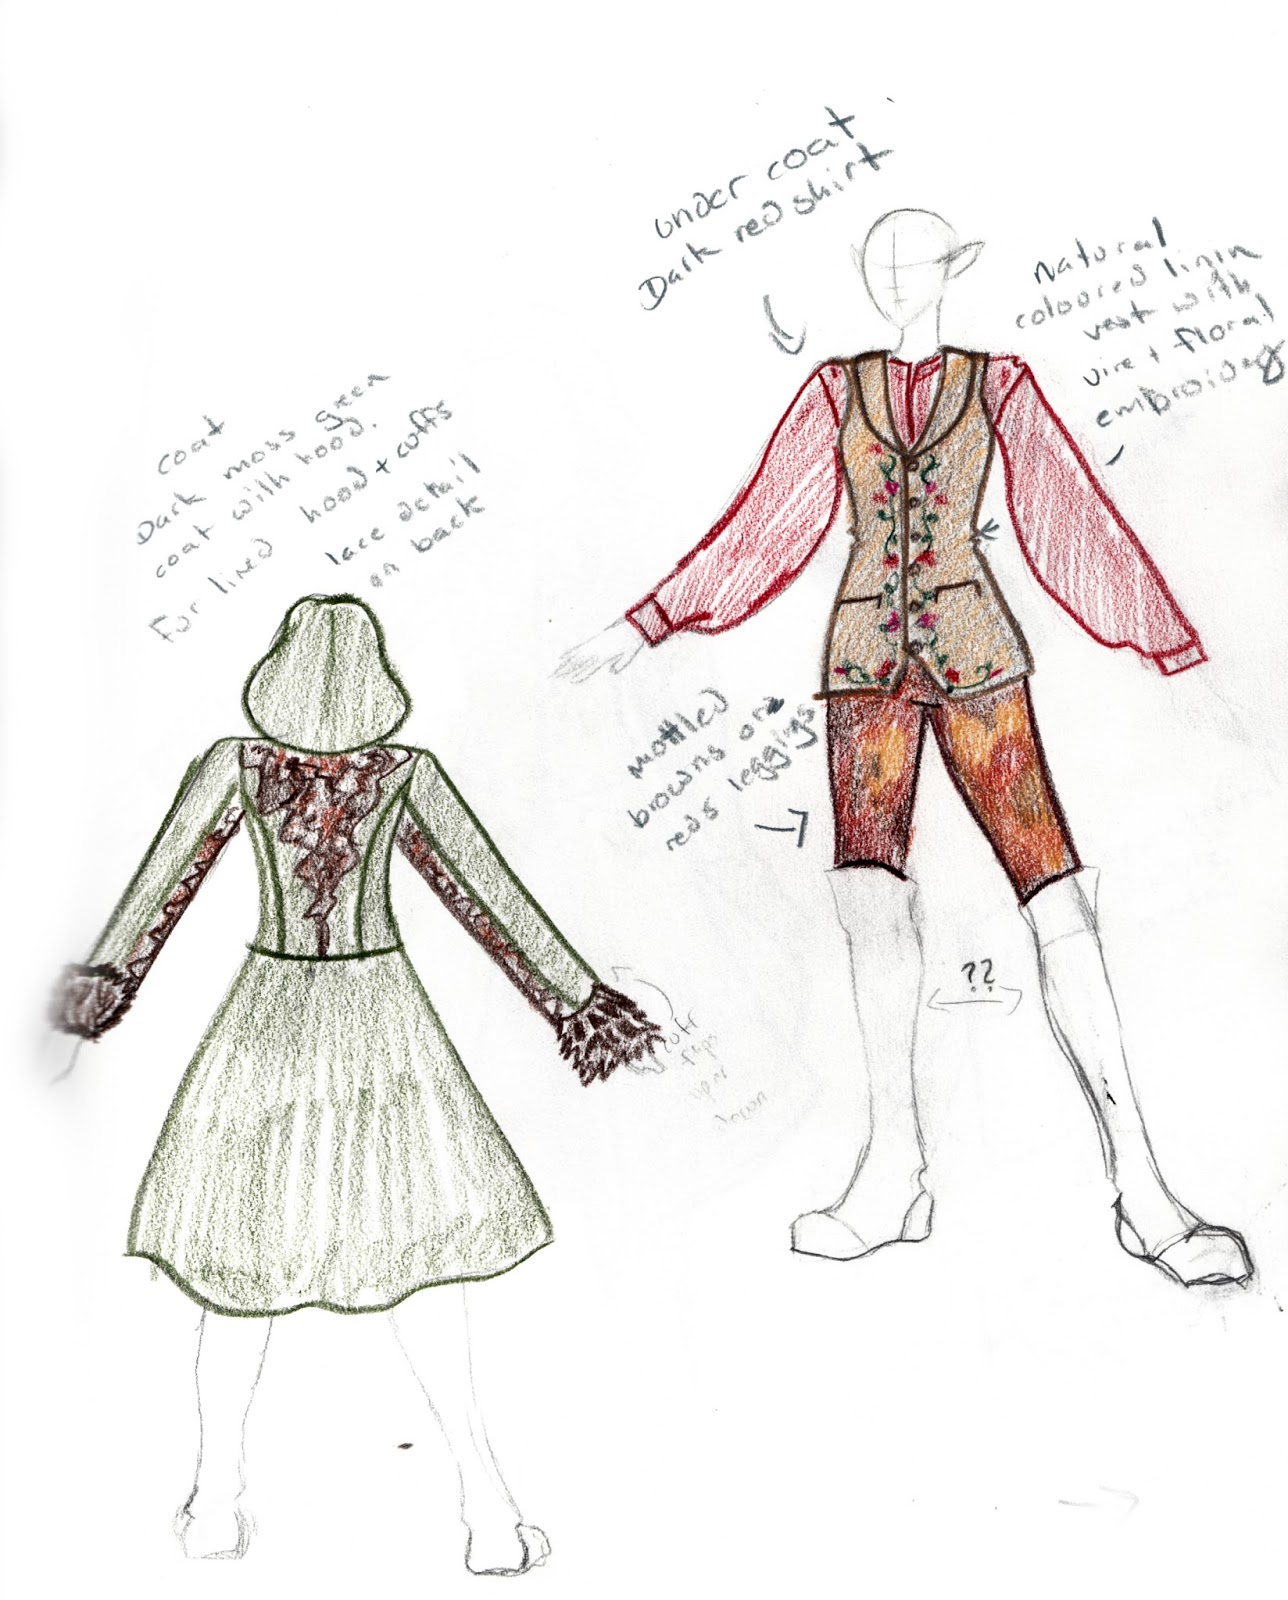
I decided that for Halcon 2016 I would do an original design/character. It is going to be an Elven Ranger.  I could have done another anime/game cosplay, but Halcon is in November and most cartoon characters have not much in the department of winter wear.  This way, i will be warm and hopefully look cool!

The coat will be made of a moss green pinwhale corduroy with lace and fur details and lined in lace and a splatter painted orange satin.


The vest will be made from Linen suiting, the shirt from a red Indian cotton and the pants (tights really) are a mottled glitter spandex that I will be using the wrong side out (therefore no glitter).

Here is the fabric stash! I went with the brown mottled fabric down at the bottom and not the red, I thought it looked like tree bark.


I just finished one side of the embroidered design on the vest and I am about to start the next!  When it is all ready to go it will be lined with the black satin in the above picture which has foxes, rabbits and Unicorns on it.  Because. I. Can.


 This is the design I used for the border print.

Monday, 27 June 2016

All done!

Saya's dress is all done and dropped off to her rightful owner.  She will be wearing it at Animaritime 2016 this coming weekend.

I had a great time working on this dress! It gave me very few problems, though my surger did die while I was finishing it. (sadness)  Hopefully that can be fixed. I think ! blew a fuse.  At least it died when I was on the very last step.


Anyway Enjoy!  Hopefully I will have more pictures later.


Friday, 17 June 2016

What a weekend! (and Tuesday!) I went from a mock up and a half finished skirt, to a full dress waiting to be hemmed!


The fitting I had on sunday went well.  The skirt is very fun and poofy over the wedding dress crinoline my client bought.  I fit her for the mocked up top and positioned the red band near the hem line.


We decided to probably keep a lot of the length in back, while not 100% accurate to the dress in Blood plus; trains are fun. So it stays.


 Here is where she stands right now. All the trim is added and the lining is all attached. I'll be hemming it Monday after I pin my client for length.


Now with 100% more zipper.

Sunday, 12 June 2016

"The circumstance of this skirt is the size of a 2-man dome tent!" -Bronwen Robbins

I actually did say that yesterday.

Hi everyone! I neglected this poor blog again. I am sorry.

I did get all 3 Sailor Venus costumes done and I wore 2 of them at Anime North 2016.  Why only 2? Because I was sick and because Toronto that week was like walking on the surface of the sun, and unbelievably humid. Like we would have been less wet (the sweat UGH) if we had been on the bottom of the ocean.

Anyway!  I am back in nice rainy not humid New Brunswick and working on a commission for Animaritime at the end of the month.

And here she is:


That's right! Saya from Blood+.  I am excited.  My client even has a twin sister who is a singer.  We are trying to convince her to do Diva next year with her sister.

Anyhoo.  This costume is a hybrid.  The top is by ME!  and the bottom is by McCalls patterns.  Cause why waste all my precious drafting paper on the huge skirt pattern when McCalls already has patterns of what I need?


 So far I have the skirt and lining all sewn together and the choker (times 2 cause I like variety) made.  The sleeves and sash will be done by the end of tonight. Then the top later this week.


Woo~

Friday, 22 April 2016

Hello again!

Things got away on me there.  I've since finished both Sailor V and Princess Venus since the last post, and I have started on Sailor Venus!

So here is what I have been up too!

I finished the compact for Sailor V:
Outside


Inside.
The good weather arrived, and after some trial and error with paint jobs, I got the shoulder wings for Sailor V done. I tried doing an acrylic wash with silver paint, but it was streaky and I hated it. I tried my peweter spray paint, but it was WAY to dark.  So eventually I found some silver spray paint (with a  hint of glitter) and this is the result.

Indoor, with natural light
Indoor, in shadow.
 And here is the finished Princess Venus dress!

I had just enough wind that day to help show it off.