
Showing posts with label Anime North 2014. Show all posts
Showing posts with label Anime North 2014. Show all posts
Sunday, 1 June 2014
More to come, this time with a spear!

Saturday, 31 May 2014
Dat codpeice!
So Kain, has this....wonderful? Questionable? Weird? purple banana hammock thing going on. I think it is meant to be a codpeice, but one can never quite tell with Amano inspired artwork. So, with all the armor over to our painter to be primed and painted, it was time for me to start the fabric parts of my costume (HOORAY FINALLY!!)
So, I am a lady, and a many banana hammock would have just looked.... bad, so I had to think of what to do to make one work for my shape. And then I recalled I had won this "lingerie rose" at my friend batchlorette party earlier this winter and therefore had a nice cheap thong to hack apart and take a pattern from.
Remember kids, when cosplaying, recycle, reduce and reuse! Everything has a purpose!
After what was a very short time, I had that lovely red thing taken apart.

Very soon after that I had a pattern for it.

I made this lovely thing out of a purple leather look fabric and some black stretch cotton. Once on it is much smoother, it is the lingerie stitch making it look all rippled.

Next up: The corset!
So to begin with, I cut out the shape of the yellow dragon stomach thing Kain has on his under armor. I personally think it looks like a turtle tummy and not a dragon tummy, but eh!
I cut out a piece that looked like a fat peanut and then I made a small paper template of the diamond/ Zelda Rupee shape that it is quilted with. I started in the center and worked my way out, tracing out the shape till if filled the entire price with a pencil. Then I sewed it to make it look like it was quilted or embossed.

Close up: the acrylic wash made it come out mottled looking like actual lizard skin, and highlighted my stitching even more. The effect is pretty awesome.

The next step was to attach it to the corset I made, well fake corset, it has no boning and zips up on the side. I took my judy off her stand and laid everything out on her and then pinned my tummy piece in place. I then sewed it down by hand with invisible thread.

The next step after the tummy part was attached, was to attach the silver leather cord piping for the piped details. I drew out the pattern on one side first, then attached the piping and then (again) used the tracing paper/etching technique to get the pattern and transferred it over to the other side so they are mirror images.

After the front was done, I did the same with the back. You can see my red chalk lines from where I traced the pattern onto the second side. The piping is also attached with the invisible thread by hand.

The final product (back). Now that I have worn this, I plan on adding some straps. While it fit well in the front, I think the edge of my back armor caught it and caused it to wrinkle in the back and I want it to look smooth everywhere when I wear it. So I am hoping straps will fix that issue.

For some reason (probably I was running short on time) I have no pictures (yet) of my finished butt-cape. But here is the pattern pieces. I'll try to get some better pictures later.

I think this is where I left off?
Apologies if this is a duplicate post! I looked though, and I don't think it is. I think the photos just look familiar because I took them. :) The deadline came up and well, the poor blog feel to the wayside.
So Collars! It was pretty easy, I took a piece of tracing paper and etched out the lines of the front and back necklines. Then I made a collar shape on that and cut them out of the craft foam.
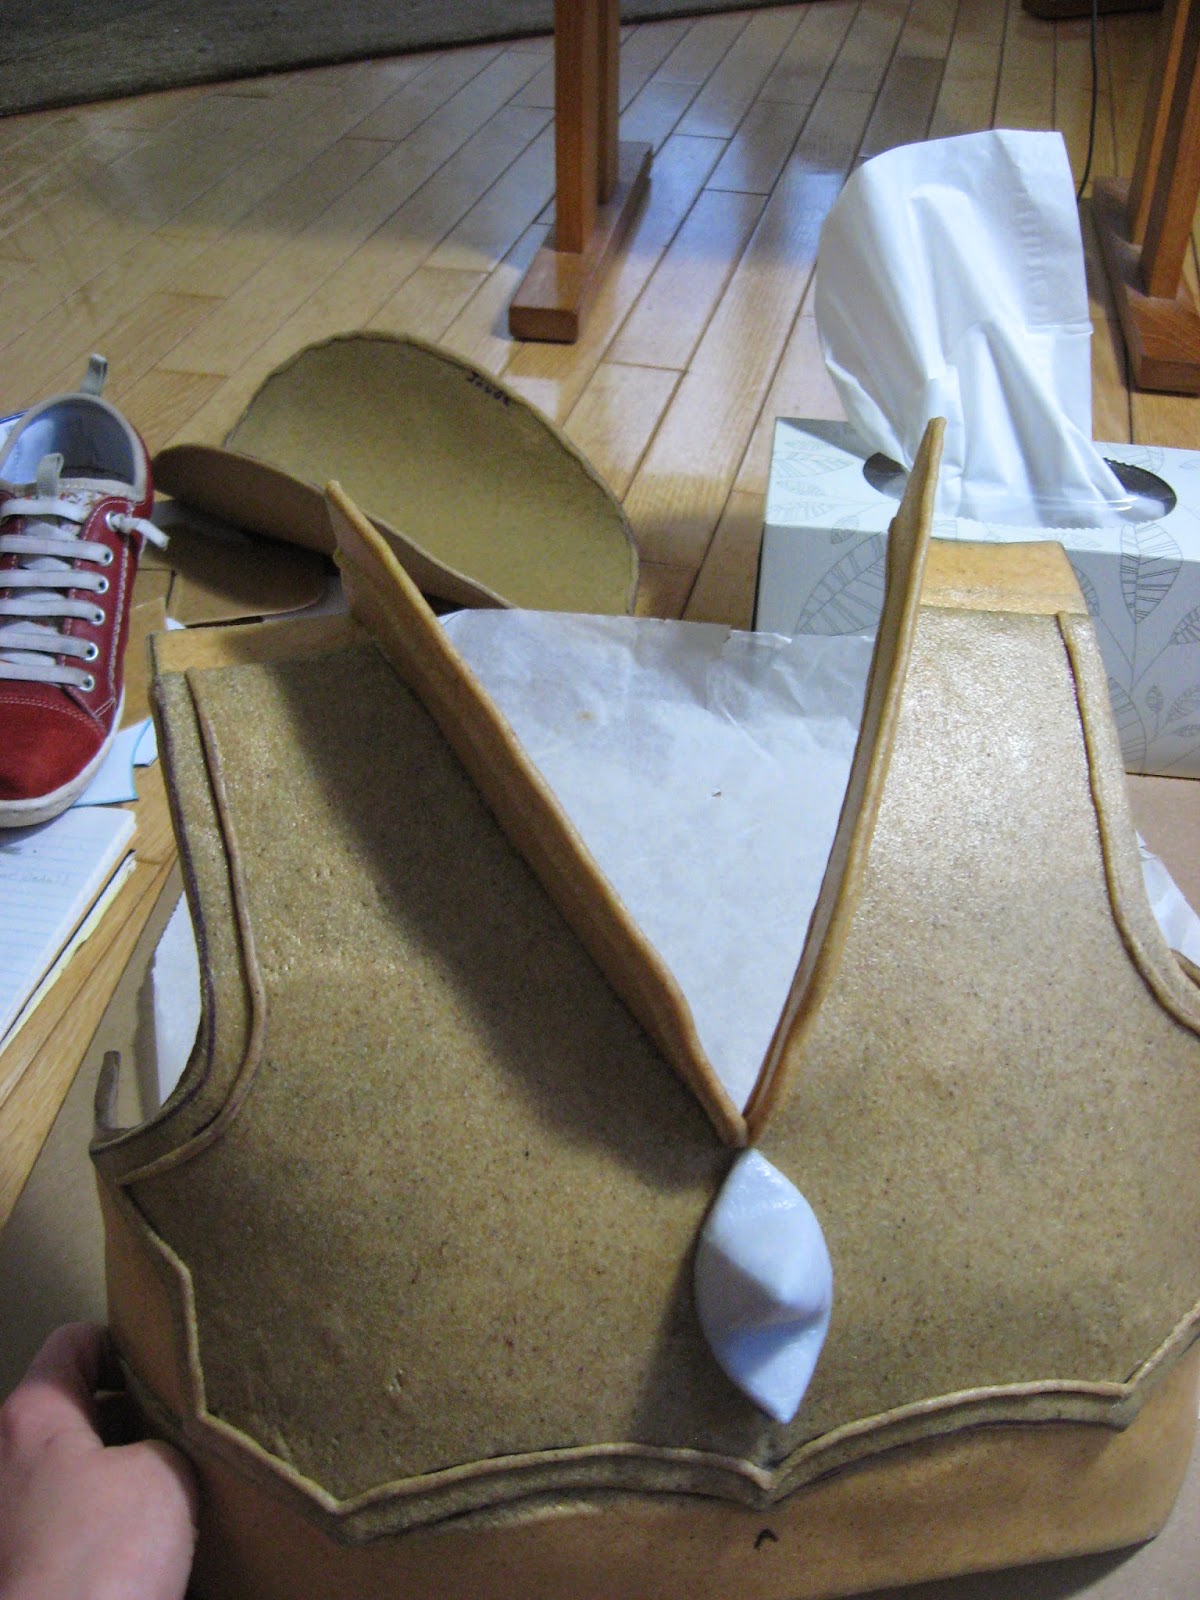
The raised edge in the center is a thin strip of craft foam I glued to the bigger piece (like I did for the belt) and then once everything was attached I added a tiny bit of worbla piping to finish the top edge.

I then repeated the process for the back.


I used this tutorial to make my mold. Cosplay Supplies, btw (the website that link goes to) is where I buy all my Worbla and Wonderflex. All you need to make the mold is a balloon, newspaper and some paper mashe mix, then go to town like it is grade 4 all over again!
The result is a rounded mold. I did mine in 4 layers of paper mashe, and then once that was done, I sanded the heck out of it to rid myself of any lumps or bumps. I still found it a bit lumpy in the end so I taped over the whole mold with masking tape, building up any areas next to lumps till it was all pretty much smooth.
Then I found my centers which I would need to know for placement of the spikes on the armor.

I was running up to my deadline for it to be done and didn't want to make 2 balloon molds. Plus I wasn't sure I could get them to be the same size and shape so before I started covering it in worbla, I covered it in saran wrap so the worbla would not stick to the mold. I then drew on the (basic) shape of my shoulder armor.

Then once that was done, following the above mentioned tutorial, I cut out rounded pieces of the worbla and started coating my mold. Eventually I got these weird looking things below. The 1 layer however was pretty flimsy, kinda like the way an empty pop bottle feels, so I ended up doing a second layer inside as well.

After I got the shape I wanted, it was time for the edge of the armor to be attached and to make the spikes.
I made the basic spike shapes from worbla and craft foam. I'd like to take this moment to thank first season Digimon Adventure, without it, I would have gone mad by this point. (aka, hint: to make the VERY long process of armor making less tedious, find a show to marathon while you work).

This is the basic shape I drew out for the base of the spikes, to help me male the other parts later.

Again with the tracing paper, etch out the shape of your worbla.

Then fix up that rough shape with a sharpie.

Then repeat the process for the other two shapes of the spikes.

I used wonderflex for the spikes. It has a weave in it like duct tape, which makes it easier to work with and it stretches, which worbla does not.

After a lot of shaping, pinching, cutting, shaping and more pinching I got a shape I liked.

Sunday, 20 April 2014
Previously on Kain's costume progress...
Previously on Kain's costume progress: I made a belt and the patterns for some shoes out of paper and fitted them. Then once that was done I cut them out of the craft foam and Worbla. Well those shoes are done! Here you go:
I started by shaping the ankle or back part first, and then worked my way down the shoe to the toe. This way I made sure each piece fit over the previous one. I had my shoe on my foot, and shaped over both the shoe and foot. For the ankle and first spike, I had on my leg armor and moved my ankle from side to side and then front to back to make sure it would glide smoothly when I walked and would fit over/around my leg armor.

At this point all the pieces are separate. I managed to get them to not stick as I shaped by putting parchment paper between each layer. In the picture below they are all cool again and are hanging on by fit alone.

Side view! Just like in the picture but kinda boring right now aren't they? They needs something more I think...

How about Wonderflex piping? That would make them look more interesting! Kains shoes don't have this, but I feel it looks more finished now. I just cut strips of wonderflex that were 1/2cm wide and added them on. Then I noticed that he had a crest on the toe of his shoe, so I made one out of wonderflex. After that, the heel looked boring, so I added a crest to that too.

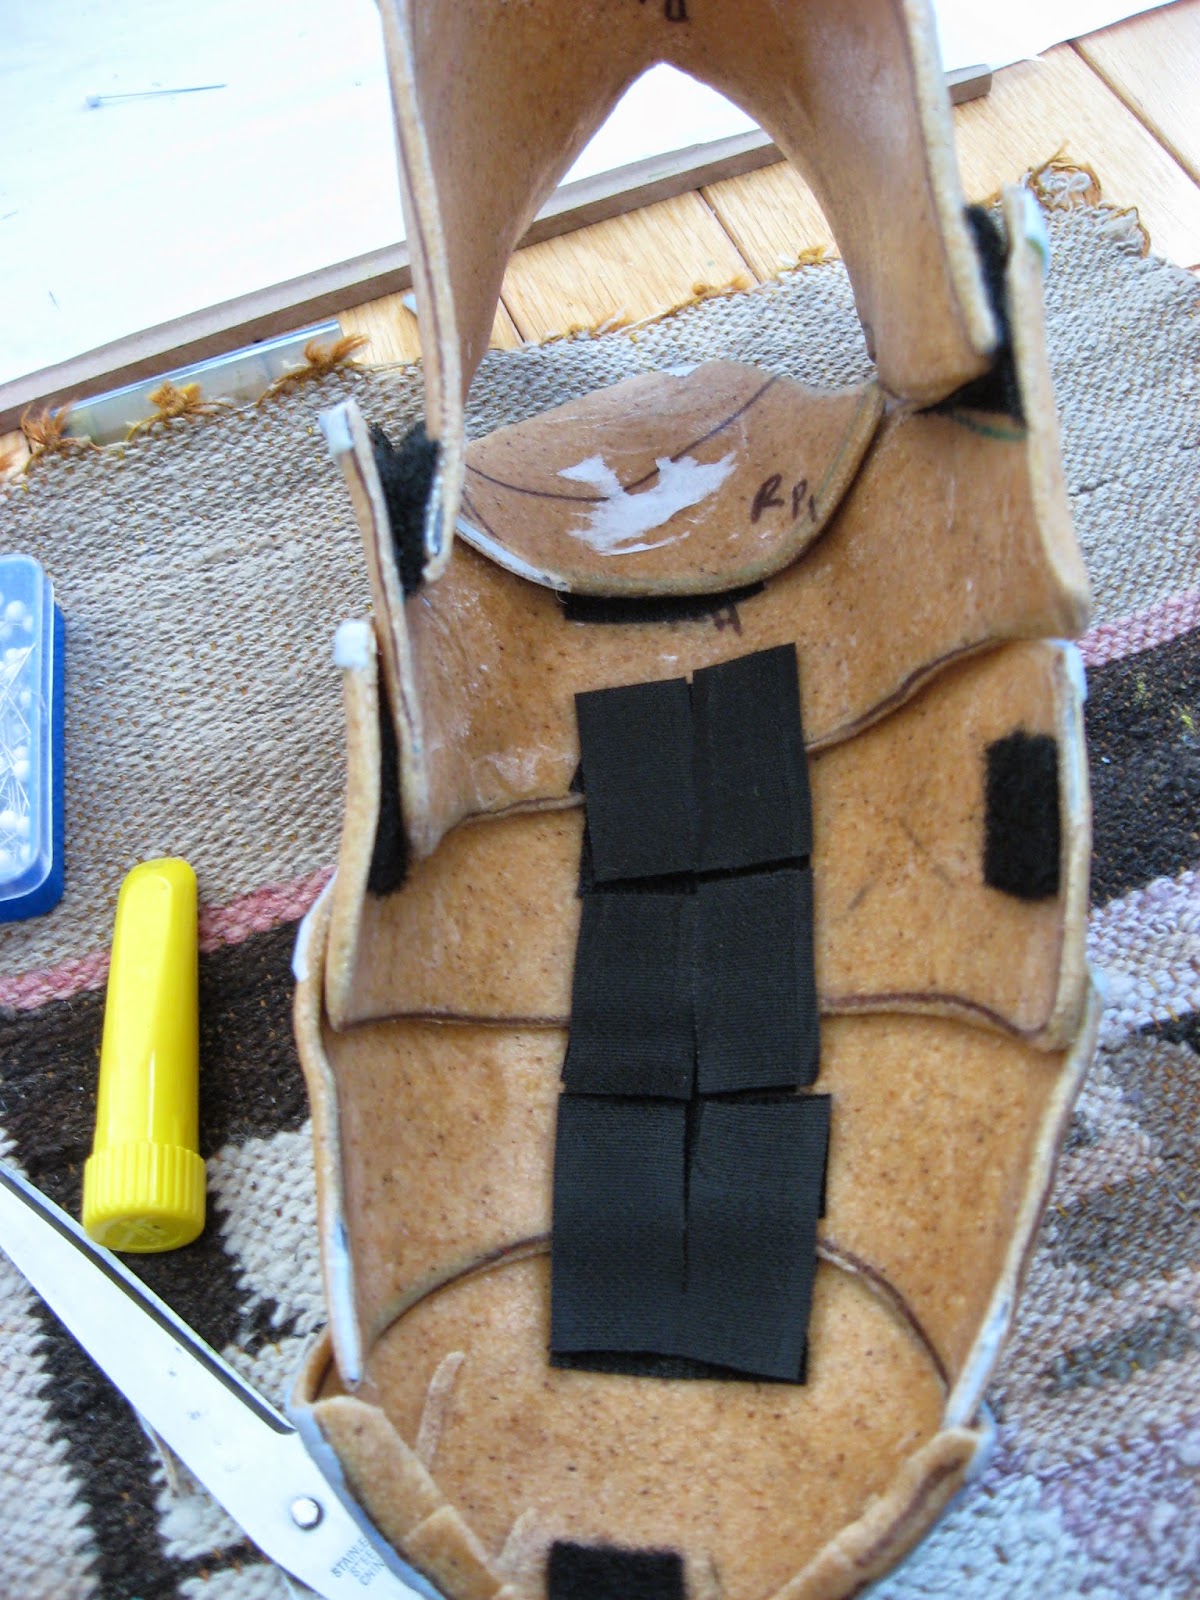
I got the idea from a friends Dragon age spine that he did for his costume, so it would bend and sway when he walked. It works really well!

I did however find that the toe of my shoe always felt loose and like I could loose it when walking around an not realize it, so I heated it up and actually fused it to the second plate there so they are one solid piece. The movement is still really good.

The last thing I did was make a cross from Velcro to hold the toe/front part of the shoe to my shoe better. It attaches at the toe and on the middle plate. (You can see the pieces on the above picture).


The end looks like this, however it was not pointy enough in the middle for my tastes so I built it up with paper clay and then covered it in Wonderfelx. But for some reason I have no pictures of that. O_o The armor attaches with a worbla band around the back of my knee, and taking a page from Rashad on Face Off, it will attach with a rivet or washer so it can bend and move as I walk.

 Some of Sean (our Cecil) pieces that have been covered in many layers of Gesso. You can see my arm and shin armor in the background. Billy our painter has been hard at work!
I started by shaping the ankle or back part first, and then worked my way down the shoe to the toe. This way I made sure each piece fit over the previous one. I had my shoe on my foot, and shaped over both the shoe and foot. For the ankle and first spike, I had on my leg armor and moved my ankle from side to side and then front to back to make sure it would glide smoothly when I walked and would fit over/around my leg armor.
At this point all the pieces are separate. I managed to get them to not stick as I shaped by putting parchment paper between each layer. In the picture below they are all cool again and are hanging on by fit alone.
Side view! Just like in the picture but kinda boring right now aren't they? They needs something more I think...
How about Wonderflex piping? That would make them look more interesting! Kains shoes don't have this, but I feel it looks more finished now. I just cut strips of wonderflex that were 1/2cm wide and added them on. Then I noticed that he had a crest on the toe of his shoe, so I made one out of wonderflex. After that, the heel looked boring, so I added a crest to that too.
The next step was attaching them all together. I did this with Velcro. The heal is separate and attaches on to the very first plate on the front so I can get my shoe on and off. The next thing I did was add Velcro to each plate and then strips of Velcro attached each plate to the next. I wanted my foot to remain flexible when I walked/posed. Originally, I used a bunch of little strips, but the middle piece always felt really loose when I tried walking in them, so I replaced all those individual strips with 2 longs strips and the entire shoe is much more stable feeling now.
I got the idea from a friends Dragon age spine that he did for his costume, so it would bend and sway when he walked. It works really well!
I did however find that the toe of my shoe always felt loose and like I could loose it when walking around an not realize it, so I heated it up and actually fused it to the second plate there so they are one solid piece. The movement is still really good.
The last thing I did was make a cross from Velcro to hold the toe/front part of the shoe to my shoe better. It attaches at the toe and on the middle plate. (You can see the pieces on the above picture).
Once the shoes were done, I started to work on my knees. I made a basic crest shape for the back, and then worked the point on Kain's Knee armor out with paper and tape. I ended up with 6 pieces for the point, 4 triangle like ones for the front and 2 long curved pieces to raise them up and out from the back shape.
The end looks like this, however it was not pointy enough in the middle for my tastes so I built it up with paper clay and then covered it in Wonderfelx. But for some reason I have no pictures of that. O_o The armor attaches with a worbla band around the back of my knee, and taking a page from Rashad on Face Off, it will attach with a rivet or washer so it can bend and move as I walk.
When I shaped it to my knee, I wore my thigh and shin armor to make sure it would fit over both nicely. I also shaped the flat back crest part first and then attached the raised point you see above after it was shaped. The first time I did this, I made the mistake of trying with the entire knee, point and all together and could not heat it all up properly to get it to shape, so I scrapped it and started over. Lesson learned. On to the next!
BONUS PHOTO!!!
Friday, 28 March 2014
That was easy..
I made the belt for my Kain cosplay the other day, compared to the shoe, which I did after it was a walk in the park!
We wrapped my mid-section with saran wrap and tape and marked the center and where my sides were, and then cut it off. I then took it and made a nice paper pattern for each piece, because I found I really did not like the straight from tape patterns. I think my fashion designer background requires I have nice copies of my patterns so I can tweek them till they are right.

I mad the pattern into three parts. The winged part, the circle and then the design on the circle. The wings and circle I did out of worbla, and the detail work I did in wonderflex.

Tracing my wings onto the worbla.

The belt "kit" as I have been calling the pikes of parts. You can just see on the white craft foam in the picture below that I glued some thin lines of craft foam onto the lower wing. I wanted there to be a raised detail to make the belt have more interest then being a purely flat thing.

After everything was cut out it was time for heat. Now in the pictures I have of Kain the circle is a rounded buckle that curves out, which is hard to do uniformly by hand....

Sooooo, enter the kitchen strainer! I had though of using a mixing bow, but their edges are not completely round, I was stumped for a bit, but then remembered the kitchen strainer would be completely round!

Now here I have it just on top of the strainer, but when I actually heated it, I put a layer of freezer paper between it and the strainer to make sure it would not stick. I use this strainer on a regular basis after all.

The finished product! This is the back, which you wont see. The paper caused a couple little lines to appear, but that is okay.

Fast forward to sticking everything together: The near final piece, just needing some raised details on the gray part and more shaping.

Tuesday, 18 March 2014
The return of the monster face! Or time to finally do those chest details!
You may recall the pattern I made for the crest shape on Kain's armor. Well now that I am back in business with wonderflex, I can finally do something with it! Woo


I then transferred that pattern to the Wonderflex and attached it to my armor! Be sure to heat up both the wonderflex and the worbla where you will be adding the wonderflex, or it comes apart when dry, I found that out with the front detail on my shin armor. Thankfully, re-attaching it is as easy as heating it up again.
Now I got busy working and forgot to take a couple pictures here and there...
So you can see that not only did I attach the front crest, I also (shortened) and then covered the raised spikes for the front of the armor and attached them. Kain's armor also has 2 rivet like things next to these spikes, so while the worbla was still hot, I grabbed some tiny halo-snap tops from my sewing box and poked them in. Now I knew from a tutorial that they wouldn't stay in once the worbla cooled down, so I put glue on the backs of them and then stuck them back into the conveniently marked holes from the prongs on the back

The next part was to cut out the bottom band on the crest and the little toothy things. The toothy things are raised in the picture I have of Kain's armor, so it was time for some fiddly work. I cut out the shape of the toothy-things in three different sizes and made some tiny pyramids. Then, holding them down with the blade of my exacto knife (the wind from the heat gun just blows tiny pieces around if you don't hold them down) I heated them out and smoothed down the edges till they were gone, leaving a raised triangle. I then took a pencil and using it as a tiny rolling pin, rolled towards the center of the pyramid making it go to a point.

Next I attached the bottom band and then reheated my tiny pyramids and attached them as well. They got a wee bit misshapen, but I just straightened the edges with the blade of my exacto knife while the plastic was still hot.


Now that the lower chest was done, I took my little horn shape for the chest armor and covered it in Wonderflex and attached it to the armor.


Now, all that is left is the collar on this piece and a belt on the side seam. Woo!

Bonus!
I got a bunch of work done on the back of my shin armor too!
I got a bunch of work done on the back of my shin armor too!
I covered the spikes for the back of my shin armor and attached them, then it was time to start making the 3 other spikes that go onto the back of this piece. One on the inner side, just looks more like a bent out piece of flat metal rather then an actual spike, so I made a pattern for it and cut it out of the worbla.

Sorry blurry picture. I decided having this random piece just hanging out there looked silly, so I put to more halo-snap tops on it to make it look like it was riveted to the armor.


So far so good.


Enough for today!
Subscribe to:
Posts (Atom)