Friday 24 July 2015

I guess I should post pictures of the belt...

Add caption
Wow, I really, really neglected this!  I posted a ton of my progress work over on my Facebook group, between commissions when I had time, but not here.  Sorry about that.


So one of the costumes I worked on for Animaritme this year was updating the Steampunk outfit I made last year for fun to go with some goggles I bought at Anime North (Pictured below).

 This year I was part of a group of Historical/ Steampunk themed Avengers, and I was Captain America (because Cap is the best Avenger).
 

Last year it was vaguely Captain America themed, this year I took it up a notch and based the look from Captain America: The first Avenger.  Which meant the star, the boots, the gloves, the gun and the belts.


I based my belt off random screen caps of Cap, one of which I later realized was actually his Winter Soldier costume, but it was the back, and it looked neat.


This was my first attempt at making a functional belt.  I used my brain and screen caps to figure it out. It is made from two colours of brown vinyl, rivets and some paint.


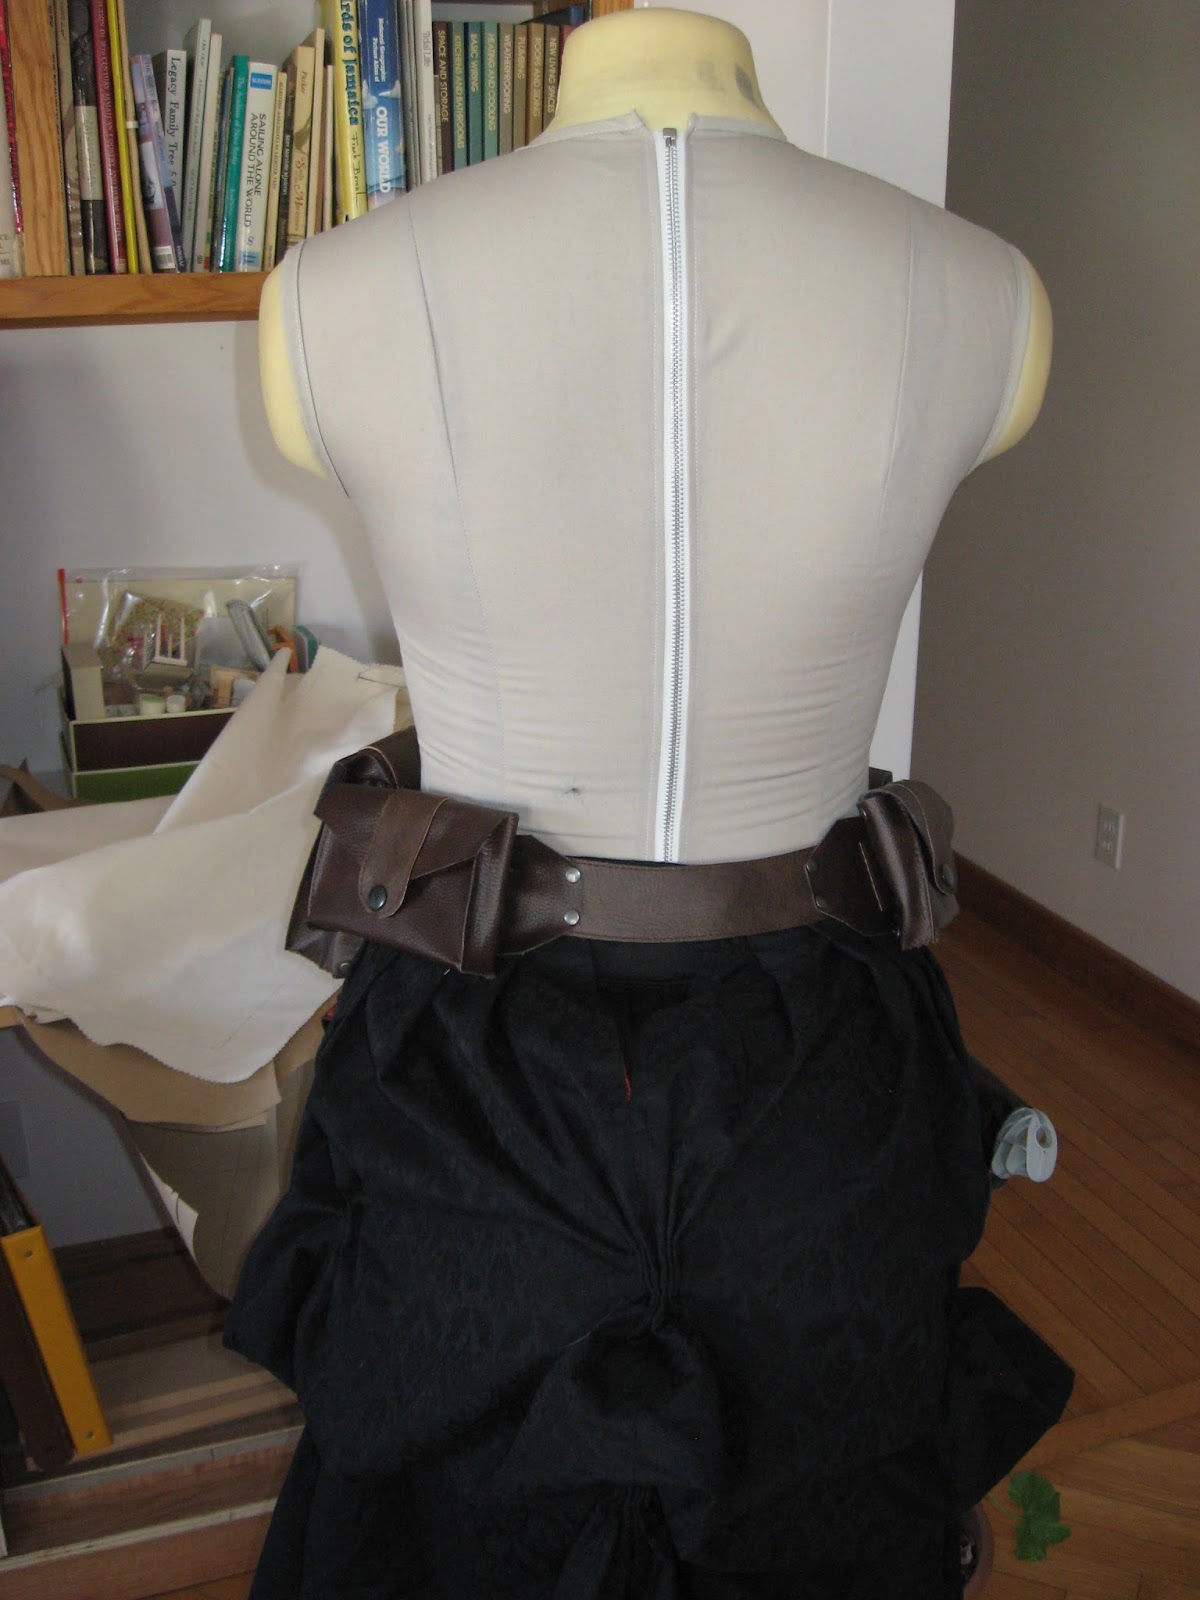
My bustle holds it up nicely.

I made the buckle less bulky and more feminine to go with my costume (and my size).  The pouches were what  Ned Flanders would call "a honeydew of a melon scratcher" because I had never done anything like that before.  Luckily, I made these around the time I was making the under vest for the member of the 501st (Star Wars cosplayers), which inspired me to go looking for tutorials on how to make their pouches which were really similar looking.

Mine appear big, because I made them to carry my wallet, camera and DS, so I wouldn't have to carry around my purse while in costume

I made the holster after googling images of  "leather gun holsters" and pieced my pattern together from those.  What I did before Google image search, I do not know. It is my greatest resource.


  And here is my gun (which I had posted pictures of before) all painted up and ready to go.


We had the luck of accidentally getting pulled into a Marvel Photoshoot by  Dylan of SpoilersPhotography while we waited for our official group photoshoot to start (I'l post those as soon as I get them), so for once I actually have some decent pictures to show of my costume!


Shield paint job thanks to Billy Peterson

And here is the four of us!  Two costume contest winners in our group this year!  I won second place and Laura (our Rogue) won third!


Ruby Rose (male version) belt RWBY

In return for painting my Sheild to look battle damaged as it appears on the Captain America: The First Avenger DVD, my client/friend Billy asked me to make the rose for his Ruby cosplay.  


He would supply the Rose detail and the bullets, the rest was up to me.


Thankfully, with a bit of adjusting for the length the belt I had already made for my Cap costume worked for him too! It is made of black Vinyl and held together with Rivets.


The spare ammo-clip pouch is made from silver vinyl and can hold a 3DS or a guys wallet.

My client/friend used Nerf darts painted silver for  Crescent Roses (Ruby's scythe/high impact sniper rife) bullets.  I had none on hand but did have a small screw driver who's handle was the same circumference of a Nerf dart, so I used that for the spacing/sizing of the bullet loop-things, and then sewed them down.

Wednesday 22 July 2015

Things kinda got away on me there.

Whoops!

Things kinda got away on me there.  I had a couple of commissions to do, (and my own costume) before the local Anime convention happened at the end of June and then I was on Vacation.

So I guess I should get my butt back in gear and update this!

I'll post pictures of the stuff I made for my Star Butterfly from Star vs the Forces of Evil first I guess!
I saw the adds for this series on Disney XD and can say I was pretty excited for its premiere and I was not disappointed. This show is awesome.  If you haven't watched it: GO WATCH IT. RIGHT NOW.

Star, like Mabel on Gravity falls, changes her outfit on a regular basis, so you could probably do a group cosplay with several people dressed as Star, and not one outfit would be the same. I chose this one, because I liked the design and could actually wear it outside a convention as normal clothes if I wanted and not get stared at too much.

Star Butterfly, a magical princess from another dimension.
Anyway, while not many people knew who I was, I didn't care. I love the show and the character of Star, so I was happy.  Plus the costume was fun to make.

I used a Burda pattern for the dress and just changed the front from a solid green panel to the striped one.  Sadly I seem to have lost the photo I took of the full dress, so all I have are the teasers I took for updating my facebook page.


I made the bear patch out of white Minkey (or chenille) and embroidered the face myself.


I  seem to have this thing where I choose costumes with accessories I cannot find except around Halloween. I ran into this problem with Stars Devil head band, so I bought a red headband at Claires and made some Devil horns out of red Liquid Metal fabric.  I'll probably either re-make these later or will buy an actual Devil headband around Halloween this year.
The wig was a test, for a future cosplay set (more about that later)  it was 16$ on ebay and it is  good quality/heat resistant but it tangles like mad!  Which may have been due to the star shaped buttons on the back of my dress... I'm gonna comb it out and treat it with de-tangler serum and see if that fixes its tangle problem.


I bought the boots on eBay, and figured that paint would probably just rub off, so the bunnies on her shoes I did with white Duct tape, this way I can (hopefully) reuse them for another costume down the road.


The big part of her costume is her wand.  This is a digital rendering I found somewhere via Google Image.


I ended up making mine from a noise maker, a ball ( which was hollow like a Christmas tree ball) from a kids light up toy, some gemstone hearts, worbla and wonderflex.  I got the shapes of the wings, butterfluy and star by printing off pictures of the wand in the right size, and cutting them out to use as templates ( Like I did that with the hand on my Dipper Journal #3).


My boyfriend generously offered to cut the noise maker (the yellow shaft)  down to the size and then cut off part of the ball to give one side the flattened shape that I wanted for the face of it with a scalpel and a butane torch.


After sanding and painting with gesso, and sanding and painting gesso many times, I finally got rid of the rough texture of the worbla and after blocking off the parts that were not purple with tape, I spray painted it with Krylon "gumdrop" spray paint which I got at Walmart.

Once the tape was off I was able to start going in and painting the details. I used Acrylic craft paints for the white and yellow parts, but used paint pens (which I lad been grumbling should be a thing and then I went to Michael's and low and behold there were a thing!) for the blue parts.  Paint pens are made of the same stuff spray paint is and can be cleaned up with nail polish remover.

And here is the finished wand!

Next up the belt I made for the RWBY costume, hopefully a picture of the finished Star dress and what is next on my plate!