Friday 22 June 2012

Oh wow!

Most people, other then ball jointed doll owners/collectors know who or what Bishonen House is.  They are an north american maker of ball jointed dolls.  It's two guys, Donn  does all the doll casting, and making work and his partner  makes the clothes.

What has this got to do with your fashion blog you are asking.

Well, before Donn got into dolls, he worked in movies (and might still, I'm not sure) he worked on the  Teenage Mutant Ninja Turtles puppets/costumes for the first TMNT movie. When he has time, he produces some of the most awesome Cosplay I've ever seen. I've met him in person and he is amazing.

My sister is acquainted with him, since he did a custom doll of Dream from the Sandman comics for her. On a recent post where he showed off progress pictures of his costume for Otakon she told him he should look at her sisters stuff.

Long story shot, he looked and he thinks my stuff is awesome and I am stupid excited by that.  I've been a fan of his for years and now he is watching me on Deviant Art and  actually said my work was awesome.

I'm so flattered! :D

Monday 18 June 2012

Cross Processed is officially open!

Our group show (minus myself, I had to work) opened on Friday June 15 and will be up till September!
And here is the finished piece!  (The drop cloth was removed, it was only there during set up. The floor was super dusty and was getting my skirt dirty).

And from the back!


Thursday 14 June 2012

The coat, so close!


In the home stretch!

All that is left is to attach the lining, hem the coat, mark button holes and sew on snaps/buttons.  

So here is the lining now attached, but not hemmed yet.  It involves a  great deal of hand sewing.

The hem is now hemmed!  Wooo!

Now it is time for the marking and sewing of snaps. (sorry for the blurry photo)

And the marking of a ton of button holes.  The holes are all chalked on with tailors wax and the one button there is just pinned in place to make sure the holes are big enough.

After a button hole party with "Ralph" the domestic sewing machine from 1970, and a moment of "OH NO ! I don't have enough buttons for all the holes I marked!", I finally have button holes.

 I pinned inside the now cut open button holes to mark where the buttons will go on the coat.

 Now with 100% more buttons!

Yes, it is yet another shot of the back, but now with no basting stitches! Because the coat is DONE! 


Wednesday 13 June 2012

A Coat in progress

I went to a talk with the head of historical costumes at the NB museum back in March. He was doing a slide show on women's clothes in New Brunswick from the 1700's to the 1800's and I was madly sketching the slides as he showed them.

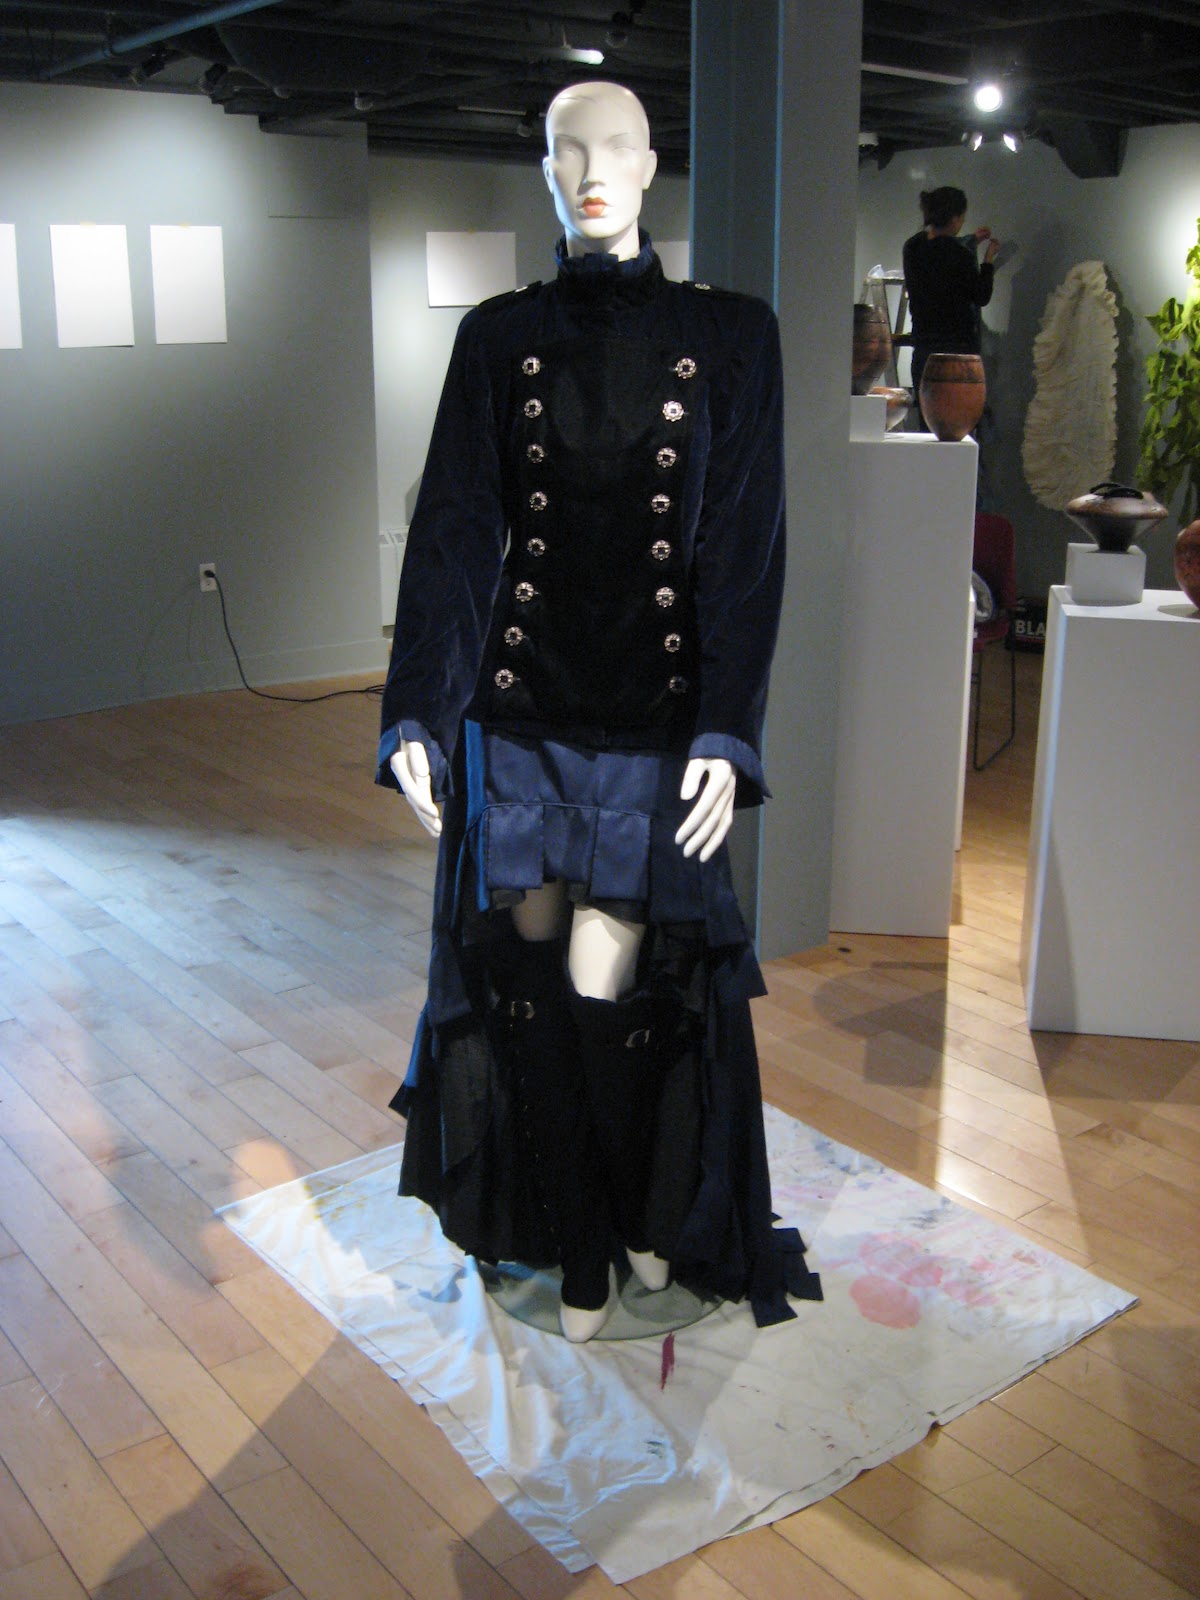
One dress from the 1700's had a princess seam back, and was a floor length version of that everywhere but the center back, where it was all Cartridge pleated, and it was the coolest looking thing ever.  So, I decided I had to do it with my coat, plus it would make the bustle in the skirt cool.


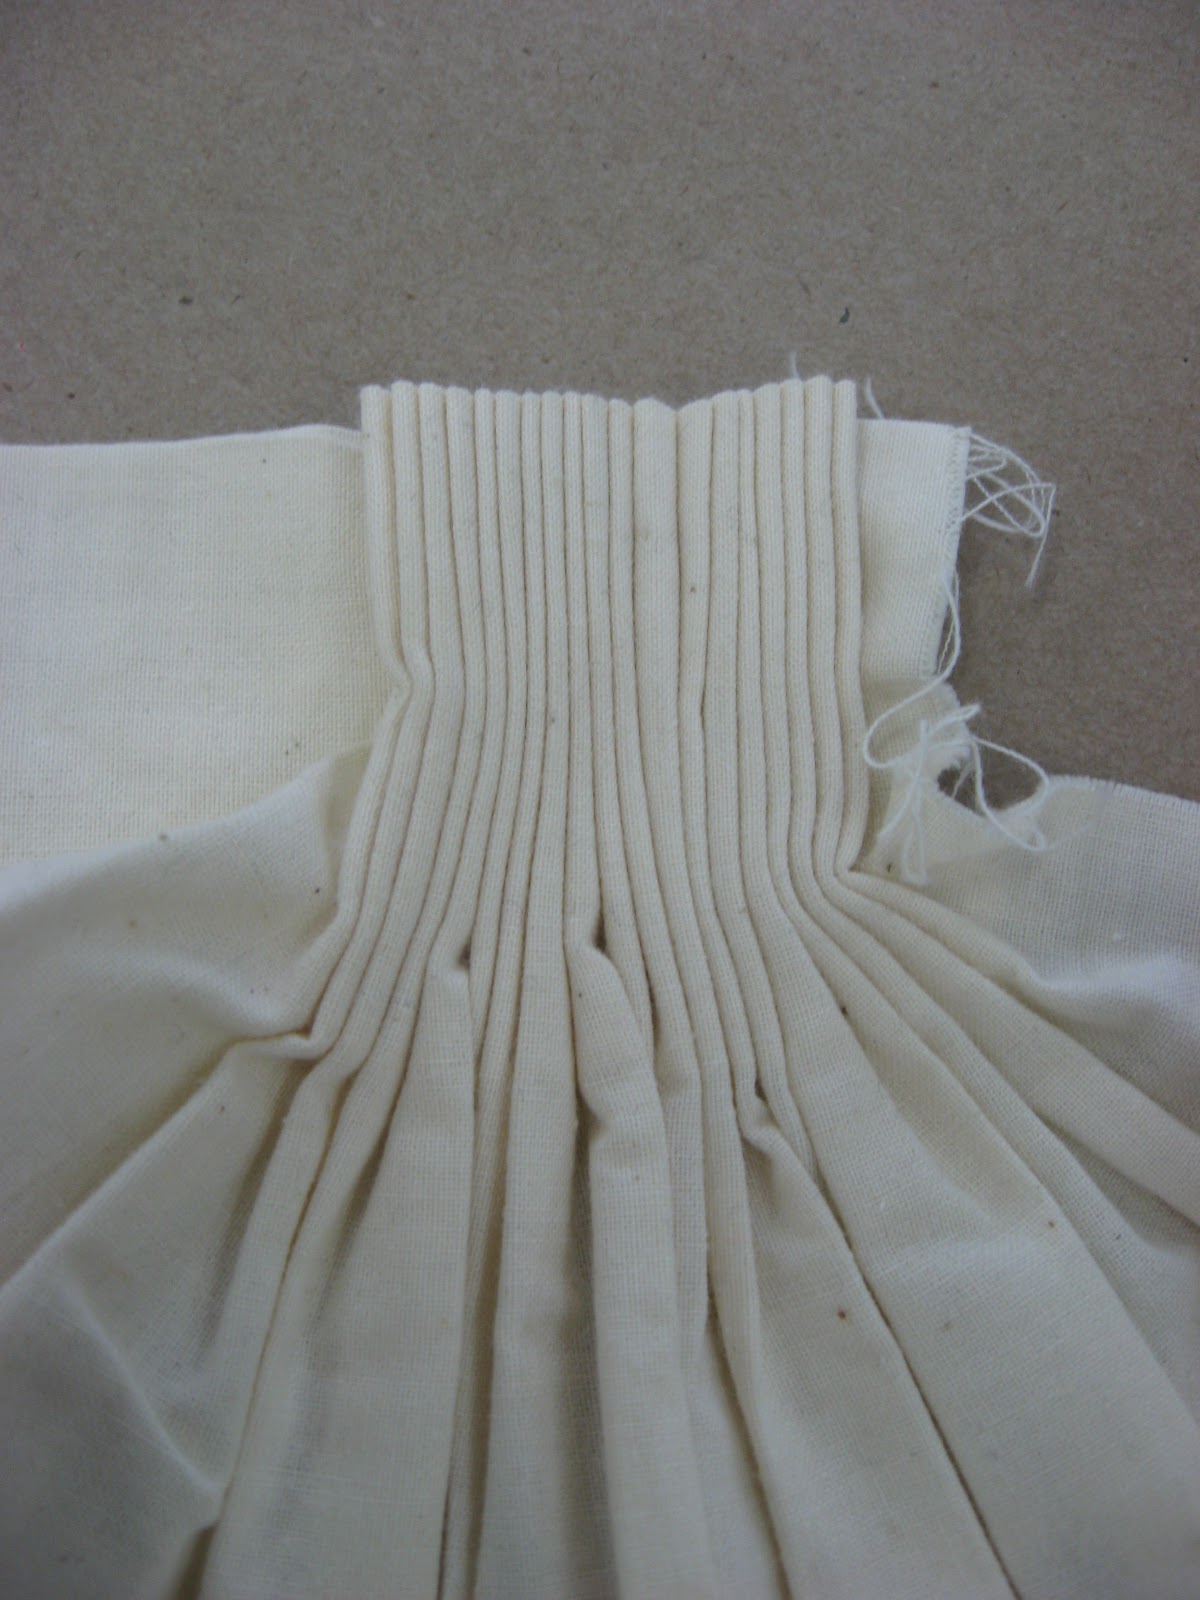
This is a sample I did when I was an undergrad.  That is about 1/2 a meter of muslin pleated there.

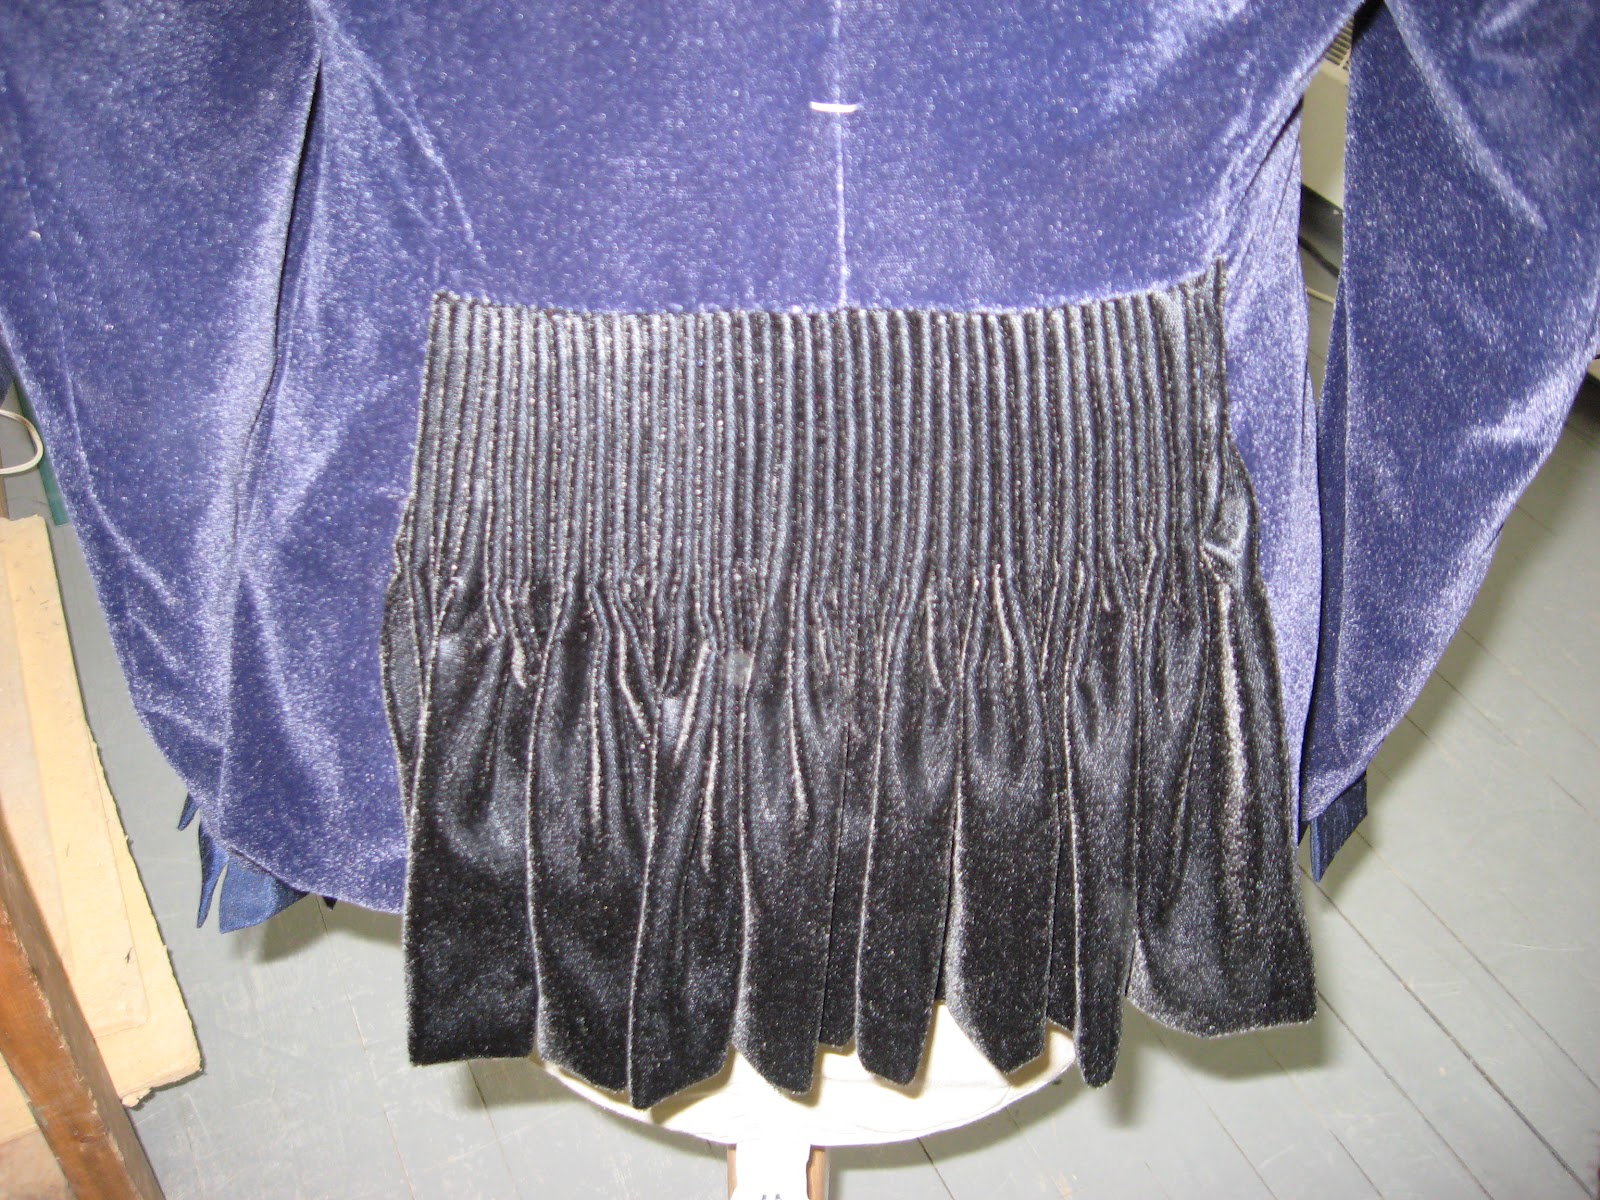
And here is a meter (aprox) of the black velvet  hemmed and marked for cartridge  pleats.

I marked  three rows of 1cm apart dots.  You basically run a long basting stitch out of Coban or button hole thread (heavy duty thread) through the dots in each row (lengthwise, not width wise). ANd then gather the pleats in.

At this point, I wanted to make sure it was wide enough to go across the hole I'd left in the back without pulling, so I  hand sewed it to the CB and then pinned it in place to the sides.

Once I had everything sew in, I ran  3 rows of back stitching on the inside of the pleats/coat. This helps keep the pleats from moving and coming undone.

And here it is all sewn in place.

Now that that the body is together, its time to attach the collar, facing and sleeves!

Now with sleeves.

No Military style coat is complete without Epaulets on the shoulders.

 I had to put pockets on the inside.

And no tailor coat is complete without shoulder pads.  The picture below is with the shoulder pad (already attached to the coat). I am getting ready to attach the head roll.  A head roll is simply a strip of folded bias cut fabric (flannel in this case) that will fold out over the edge of the shoulder pad and its seam allowances in the sleeve cap to give it a more gentle and rounded curve to the shoulder  of the sleeve.


Next up.. attaching the lining and finishing touches.

Tuesday 5 June 2012

Also a gator

Sadly not the toothy kind.

Since my skirt is short in front and long in back, I decided to make gators for my legs. Gators to my knowledge were worn by solgiers in wars to I assume keep their pants dry. They were made of wool or leather and are basically just a giant pair of knee high spats.  I saw them on The Dank's Rangers (a civil war group from Maine I believe) at Kings Landing (local living museum) and I've wanted a pair ever since.

I had a spat pattern already and so I just found some images of some gators I liked via google and then lengthened the spat pattern to go over my knees.


Here is my mock up done in brown wool. The actual gators will be black with silver buttons and buckles.

The skirt is done!

So here is the back of the skirt, it does have a little train and will be getting a bustle as well. This is before I hemmed it and added my little flappy rectangles.

I imagine you can guess from the above photo that it is shorter in front.  A fellow fashion grad calls the style a "mullet skirt" and I like that. So Here is the front view of the mullet skirt.  It has a black taffeta petticoat to make it poof out a bit more sewn into it.  The petticoat took longer then the skirt, because I had to gather a ruffle along the entire hem. It's probably 4+  meters long when not gathered in.
Here is a side view, just for fun.  This is just before I sewed on 30 or so small rectangles to the hem. I can't recall the proper name for the finishing technique, but it was better then  pleating the entire hem, which is what my original plan was.  
The hem, now with 100% more flappy rectangles.  Each flap is a little bag, sewn up the sides and then sewn onto the skirt. The coat collar and sleeves have a similar  finish to them.  I find they remind me of the flaps on  old medieval style tents and stuff.
The entire skirt flies outward when I walk in it, it's rather dramatic :D   And the flappy rectangles...flap(for lack of a better word).

Next up...

The coat is done. (mostly)