Showing posts with label Cosplay. Show all posts

Friday, 22 April 2016

Hello again!

Things got away on me there.  I've since finished both Sailor V and Princess Venus since the last post, and I have started on Sailor Venus!

So here is what I have been up too!

I finished the compact for Sailor V:
Outside


Inside.
The good weather arrived, and after some trial and error with paint jobs, I got the shoulder wings for Sailor V done. I tried doing an acrylic wash with silver paint, but it was streaky and I hated it. I tried my peweter spray paint, but it was WAY to dark.  So eventually I found some silver spray paint (with a  hint of glitter) and this is the result.

Indoor, with natural light
Indoor, in shadow.
 And here is the finished Princess Venus dress!

I had just enough wind that day to help show it off.


Friday, 19 February 2016

Easy-peasy Sailor Collar stripes.

Sailor collars, they all have stripes and there are so many ways to attach them.
You can sew them down by hand or by machine.   I sewed the Soutache braid stripes on this collar by machine. If it is wobbly it is because this is one of my first cosplays from 2005.
The stripes on my  Escaflowne movie Hitomi cosplay (one of my first!) sewn down by machine.

You can glue them down, which works great with vinyl! just make sure to clean up your edges and don't use too much, (I used too much here because this was maybe my second or third ever cosplay!)  Glue
can be messy and sometimes hard to get off, plus over time the glue may dry over time and start to peel away, but if that happens, just re-glue it.
The details on my PGSM Dark Merucry collar, done with glue. (Probably my 3rd cosplay ever)
Over time I found that best product to attach the trim is Steam-a-Seam or Heat-n-Bond.  I prefer Steam a Seam, but both would work. Both can be found at fabric stores or online. Heatn' Bond is sold by the meter and Steam-a-Seam is by the meter, in sheets and in rolls.  I used to cut the strips to size for my ribbon details from the sheets or from a meter, but I found thought I'd try this beauty this time:

It's already pre-cut into strips and comes on a roll like tape! My life just got easier!  I just used it to put down the red stripe on my Sailor V costume. My ribbon was wide enough that I had to run two strips of the steam-a-seam side by side. I did each edge separately and cut the steam-a-seam off at the corners, but I did not cut my ribbon! That stayed in one big strip off my spool until I had done all 3 edges. The last thing I wanted was to accidentally cut it too short.

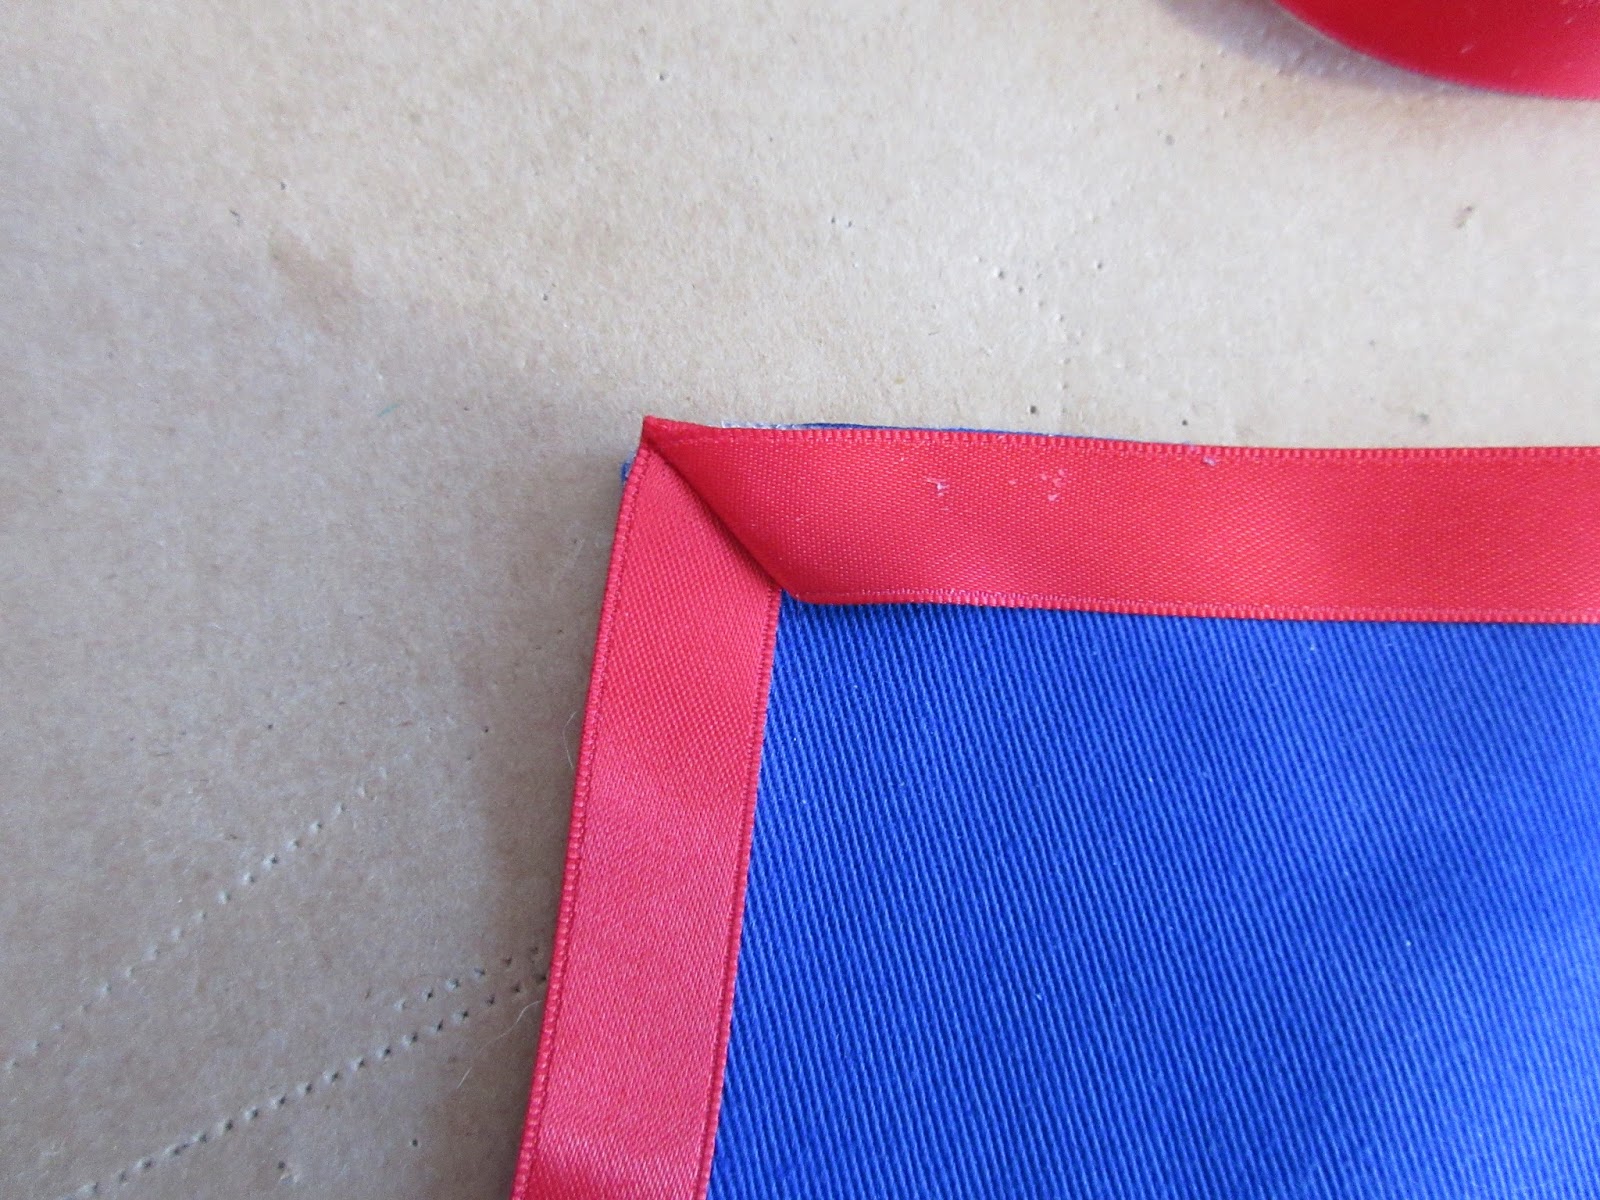
The steam-a-seam is sticky like a post-it-note, so until you iron it down it can be moved around, but it also means the ribbon sometimes comes un-tacked, so I did it one edge at a time. When I got to the corner, I did a mitered corner. Which is a fancy way of saying that I sewed it on an angle so I'd have a pretty corner.

This is what that mitered edge looks like when it is done. I then proceeded to run the ribbon along the bottom edge till I got to the next corner and mitered the other corner.  Once everything was tacked down I cut the ribbon off the spool.


Finally I ironed my ribbon down, and here is the finished product!


Monday, 8 February 2016

Sailor V top mock up!

I mocked-up my Sailor V shirt today!  Over all it turned out pretty good. I will be taking the collar in 1-2 cm along the back, I find it too big.  And I think i will be shifting the sleeve (not pictured) so the split between the red and white will be more even.


The front looks good. I *may* widen the collar opening (not 100% sure yet) and I think I may need to take it in a bit.

Wednesday, 3 February 2016

In the name of the Moon!

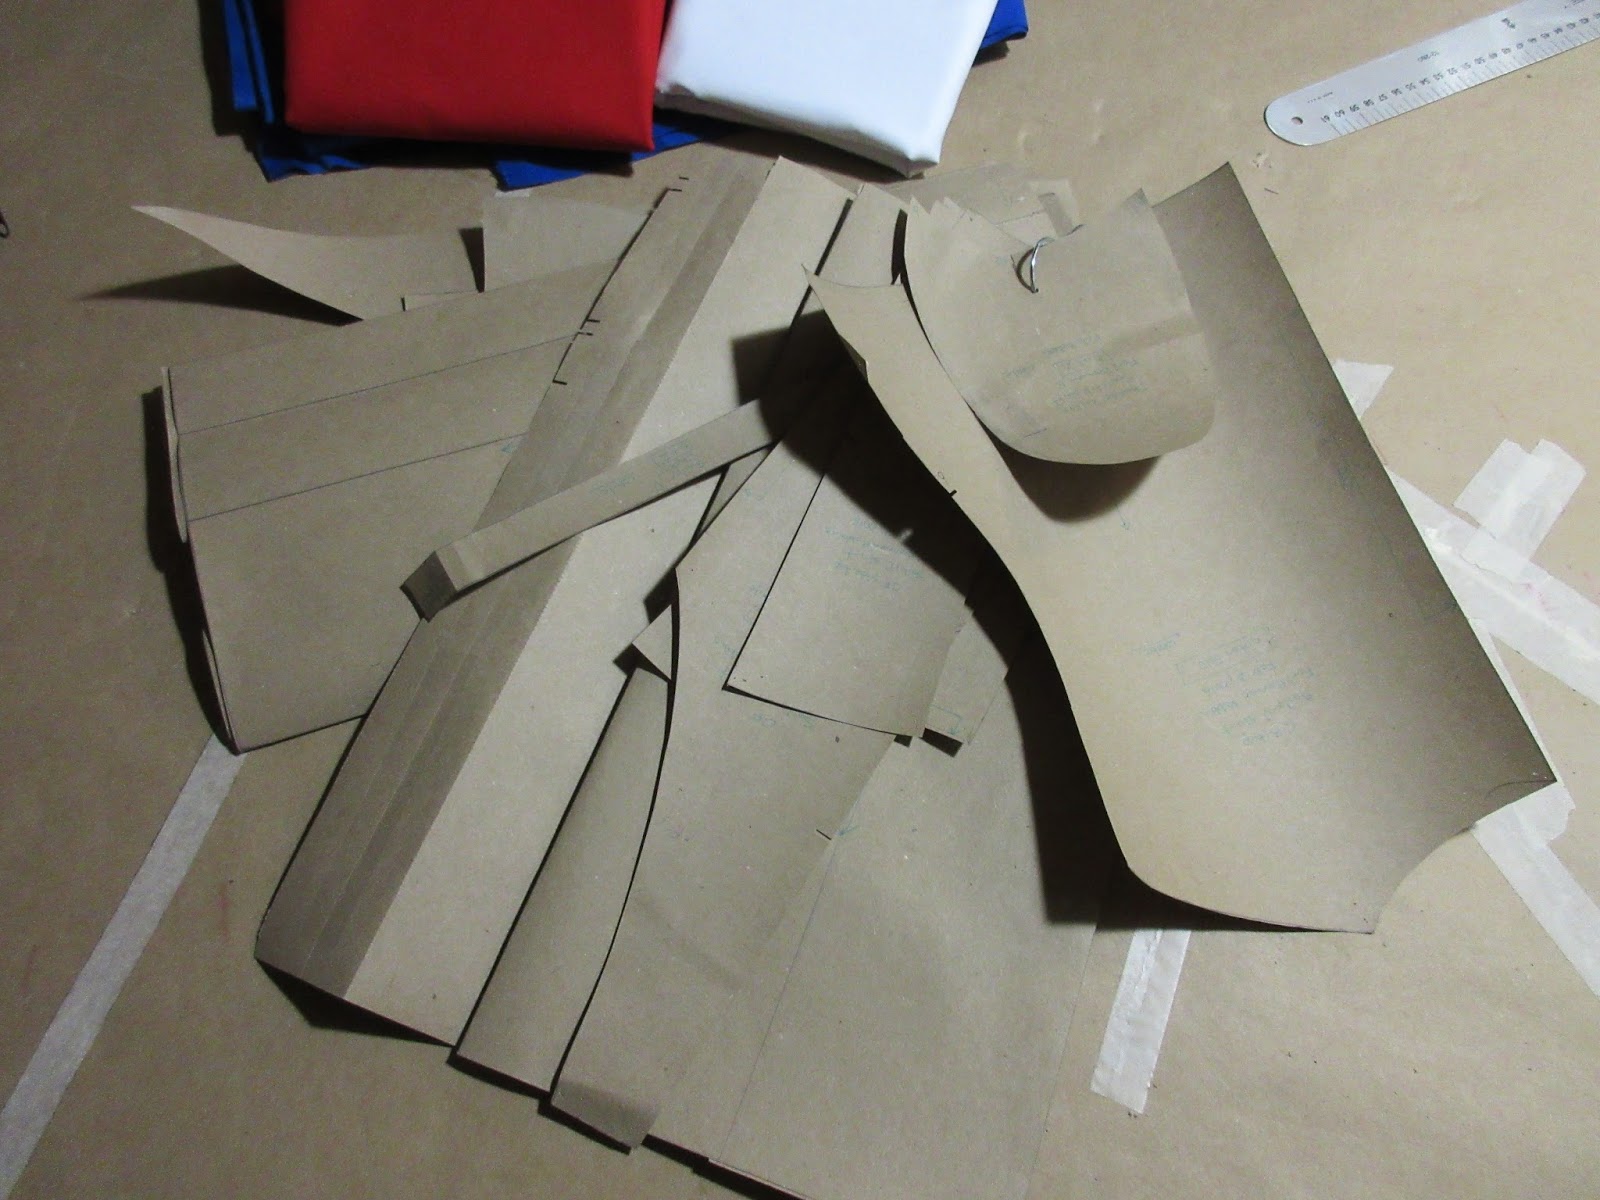
Because Sailor V does say that before Sailor Moon.  Yesterday, I started drafting the patterns for Sailor V from the Sailor V Manga and later the Sailor Moon Manga. V is one of 3 costumes I am making for myself to wear to Anime North 2016.  The other two are of course Sailor Venus and Princess Venus.  I've even got a white cat lined up to borrow for photos!
Behold! The early 90's glory of her costume!

The makings of a Magical Girl.

 Ah, pattern drafting.  The pattern math is like school, the cutting like art class and the mess left on my hands from all that graphite dust, and eraser shavings collateral damage.

Seriously, it looks like it snowed on my cutting surface.
 I'm going to mock up the top tomorrow.  It's a simple crop top, but I want to make sure it is long enough for my torso and that the collar looks the way I want it to before I sew the actual thing.


Top parts.
I finished the patterns today. I think this is one of the fastest costumes I have ever drafted and one of the smallest.

YAY!


Wednesday, 19 August 2015

Wednesday, 22 April 2015

Hot glue embossing

I am in a week long lull between fittings and have 2 days off so I decided to take those days and work on something for myself while I wait for my client to get back from a trip.

I've been fixing up the steampunk costume I made into Captain America last year to look more like his Captain America :  The first Avenger costume.

Step one was buy some brown gloves and boots ( boots are here, still waiting on the gloves).

Step two was make a nice Star to go on my coat. I got a friend who does machine embroidery to embroider a lace star for me, but it was a bit small for the coat:


So I ended up finding a template online for Caps actual chest star and cut that out of some white vinyl.  I then attached the lace star to the vinyl one:


It looks much better now I think.


Step 3 was fix up the gun.  I bought a Nerf: Rebelle gun because it had a nice shape to it and is con legal.  But it was still a bit too plain for me.  So since the coat and skirt of my costume are  Jacquard printed fabrics, I googled Jacquard patterns and found a couple I liked.

I then took some carbon paper and taped it to my gun, taped the picture over that and transferred it to the plastic.

Then I got out the hot glue gun.  I had seen hot glue gun embossing done by Amathyst Angel in her prop blog and have wanted to try it out for myself.  It is as messy as I figured it would be and perhaps a bit...imprecise?  But it was my first try. There were glue webs and tails everywhere, but that is what craft knifes are for. Also, since I was adding some wonderflex to the gun anyway (to cover up the disclaimer on one side)  I had to use a heat gun.  Well naturally hot glue when hit by the heat from a heat gun goes gluey again and sets better, so any lumpy bumpy areas were smoothed out by a quick blast from the heat gun and gravity.

Here is the end result:


Originally I was gonna do the entire top design in wonderflex, but when I heated it up, the tiny pieces got stuck to themselves by accident.  So I said screw it and finished it in hot glue.


The entire thing is going to get spray painted silver and then air brushed to make it look better, so you wont see all the mess of lines in Sharpie/carbon paper.  Here's hoping it looks as cool as I think it will when it is all done!


Step 4 will be making the belt and all of the pouches, plus a gun holster from vinyl.

Sunday, 29 March 2015

~In time-your heart will open minds, a story will be told" - RWBY progress : More corset.

The corset is together! (mostly)


Back: Black Singapore Chintz. 


Front:  Black jacquard with a rose pattern and hand dyed silk.


All the back pieces are covered in Laminating (row upon row of stitching) to stiffen it up.

And these are the spiral bones and their tips. I have yet to cut the steel flat bones because I lack the proper tools and strength right now!

Tomorrow:  Steel bones, the bottom bias strip sewed on, the last parts sewn on and grommets.  Plus I hope to get the cape done too!

Wednesday, 25 March 2015

~Welcome to a world of new solutions, welcome to a world of bloody evolution~ RWBY progress: Corset

Oh what a day!  My back is killing me!  I cut out all 4 layers of this corset today, basted what needed to be basted, marked bone casings and sewed the outer layer. I am pooped.


Here is the inside (the black pieces) and the outer layer with its flannel back.  I've still got to trim my seam allowances down and once that is done and the other pieces are ready to go, I can sew this sucker together!

And here is the outer layer flipped so you can see what it will look like once it is done.  It's made from a black Jacquard and some silk that I dyed.


Monday, 23 March 2015

~I don't wanna hear your absolution, hope your ready for a revolution~ RWBY progress: I dyed.

Fabric that is!


I couldn't find a red fabric I liked for the middle of the corset for the male Ruby Rose costume I am making.  So I made some.  I got 2 shades of red dye because the cape fabric (which I used for the red trim on the shirt) was a particular shade.


I ended up going with the lighter of the two.


Also the shirt (instead of a battle skirt) for Ruby is done now too!
 On to the corset and cape!


Friday, 6 March 2015

~This will be the day we've waited for, This will be the day we open up the door~ RWBY progress: mock-ups

The mock ups for the male version of Ruby Rose from RWBY are done and as long as there isn't some sort of GIANT snow storm on Sunday (which is entirely possible right now), I'll be fitting them then!

(And no, I do not know why the first part there is highlighted in a different colour for some reason. Blogger is being weird today. It also wont let me type in any format except centered.)


The Princess Seam mock up is just waiting to be fitted and have a Corset drawn onto it.


And the black bell sleeved sloaper cannot wait  to be fitted  for a turtleneck/cowl neck and  shaped so it is less of a...sack. (which is what it kinda looks like right now).

Monday, 27 October 2014

Journal 3 - Gravity Falls -bookmarks

Journal 3 has two bookmarks,  one that looks like a tassel, and the other which ends with a small magnifying glass.


I found some red drapery tassel at Fabricville and got 0.3m.  Which is more then I needed, but I wasn't sure dirtying up the tassel would work the first time so I got extra.  Just in case.

I cut off a bit and curled it around to make a tassel, then I sewed it to a ribbon.  After I sewed it, I took charcoal and rubbed it all over the tassel to darken it up. I then added the mud mixture I made to dirty it up even more.


The ribbon the tassel hangs from in the show is gray, but I didn't want to just buy gray ribbon.  So I found some white ribbon and grayed it up again with charcoal and added mud.  I also placed it between two pieces of sand paper and roughed it up.

I did the same for the yellow ribbon that the magnifying glass hangs from.  Both ribbons are glued into the spine of the book.

And here is the finished exterior! I have no fake metal tree to find it in, but I did have a nice mossy stump to lay it on for photos.
Front
 
Back 
  And here are a couple close ups of the  front and back with the dried mud and charcoal smudges.
Front and back

Just the front

Just the back.