This is just one layer of the rather light weight Buckram my school store sells.
I
I couldn't stop thinking about how it looked like my 13th fairy was wearing a Pet collar so she would stop chewing her stitches. The 13th fairy does not like the cone of shame. :PHow it's on there:
The neck curve was already there on the pattern, but to get it to sit better I scored up the seam allowance. One layer held the shape really well, but I was worried the fabric would bend it, so I ended up sewing two layers together, and low an behold, I didn't even need to do the wire support that was in the Elizabethan collar tutorial!
The next step was to take it off the garment/dressmakers Judy and attach the black fabric.
I pinned down the bottom neck collar edge so it wouldn't slip when I sewed it and then I edge stitched the black fabric on with a sewing machine.
After the black was attached it was time for the purple lining, which I hand sewed to the black.
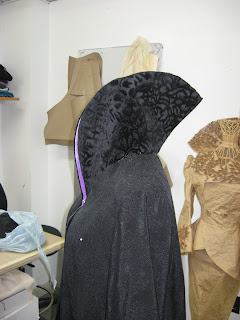
Here is what it looks like pinned onto the robe. It's a little wonky looking right now.
And here it is from the side. There is an obvious bump there, but that will go when its sewn in. Obviously
Testing how it looks when folded, which really didn't work with the pins, but you can get a general idea of how it will look eventually.
And that is all for today! The collar is on now, and I have started on the purple binding for the center front (which will conceal an invisible zipper).


LOVE the collar!
ReplyDeleteThanks Jen :)
ReplyDeleteLet us hope it ends up being awesome :D